This is a classic tale of “if you give a mouse a cookie…” and it allllll started with my 2020 Christmas gift. Three years in a row, for every gifting opportunity (Mother’s Day, Christmas, birthday…) I asked for the same thing: DOUBLE OVENS. And finally, in 2020, on Christmas morning Neil surprised me with a big empty box that had a little picture, taped to the bottom, of double ovens.
Now I never expected this present to grow into an actual kitchen remodel but here’s what happened: Neil had measured the hole where the ovens would fit, and they’d fit perfectly! The only problem: the bottom oven would open right onto the ground and hit the floor when you opened it. Oops. He realized once we talked about the present. This presented an issue of having to alter the cabinet to fit the ovens with a drawer built below to make room for the bottom oven to open properly. And well, once we were messing with the kitchen cabinets anyway and needed to call a contractor in, we decided to do just a little bit of painting, a little bit of redecorating, to make our kitchen more of what we REALLY wanted.
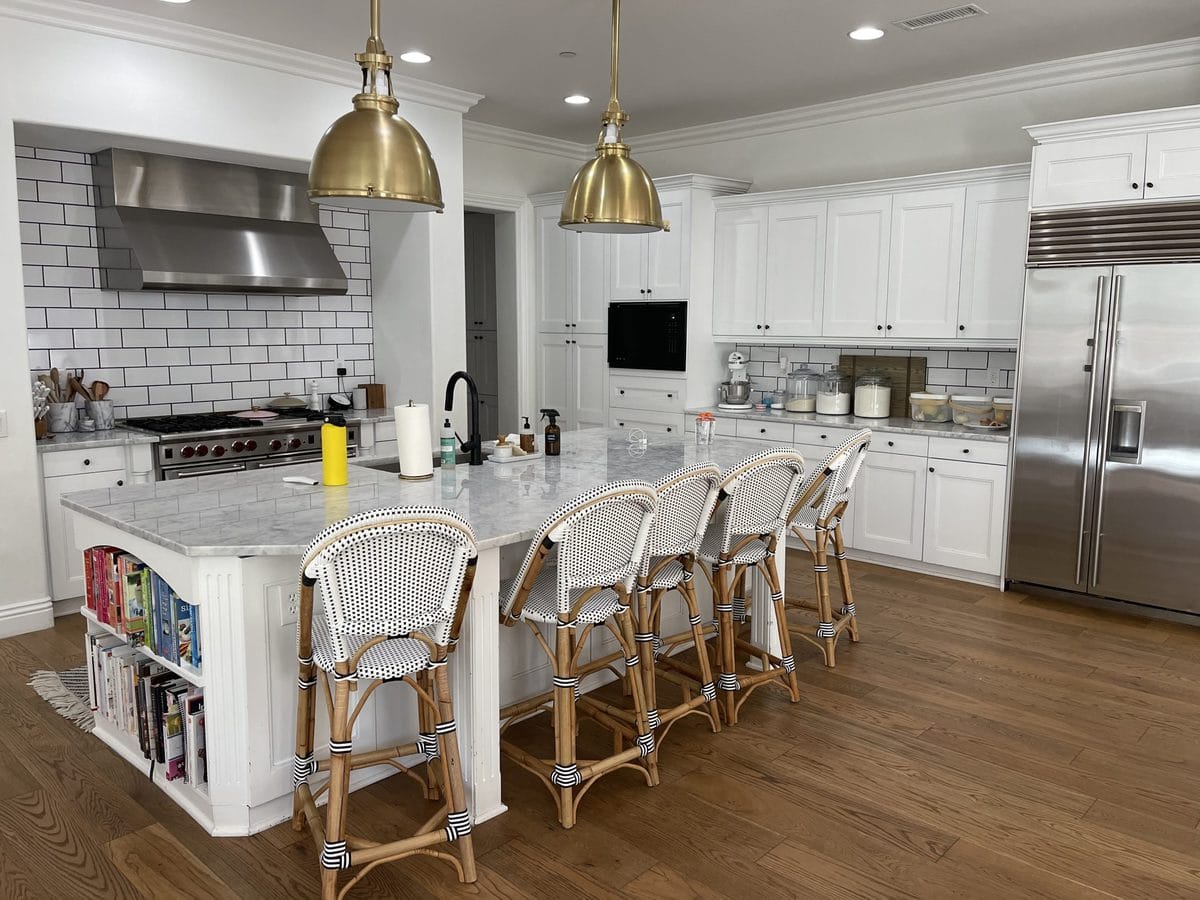
I knew we didn’t want to do a full-blown $100k kitchen remodel, so we had to get creative and work with what we had while still getting what I needed/wanted in a kitchen (you can see what we were working with before here)!
We learned A LOT in this process but also saved a lot because we really were trying to stay within a certain budget. All this to say, if you’re thinking of revamping your kitchen: I’ve got tips. I’ve got tricks. And I also now have FOUR OVENS. Here’s the story!
TIP: If you need a link to something you see in a photo, make sure to click on the photo! Or, scroll to the top or bottom of this post to easily shop, like you see above!

Jacket
Jeans
Sneakers
Rug
Photos by Arielle Levy
Table of Contents
Kitchen remodel ideas in 2021
Gas vs. electric and why 4 ovens?
Let me start by saying: I already had double ovens. They were under the gas range, but they were SO HARD to bake with accuracy.
The thing about gas ovens is that the temperature variable is massive. If you set the oven to 375 degrees, once the oven hits that temp it actually turns off! Then once the temperature dips enough, the gas kicks on again to heat it back up.
The fluctuation in temperature makes it really difficult to bake because there is no consistency for the bake time. I was constantly under and over baking things, and for a seasoned baker like me, it was VERY frustrating.
Also, the thing I missed the very most in from our last kitchen were the Wolf double electric convection ovens we left behind. I seriously missed them every day (no exaggeration). BUT! In our last kitchen we also added a warming drawer – which I used regularly to keep a dish warm and serve a big meal with everything hot at once. Instead of adding a warming drawer this time, I knew we could use the gas ovens to perform the same function on big cooking days like Thanksgiving or anytime we hosted a big dinner.
Kitchen remodel design
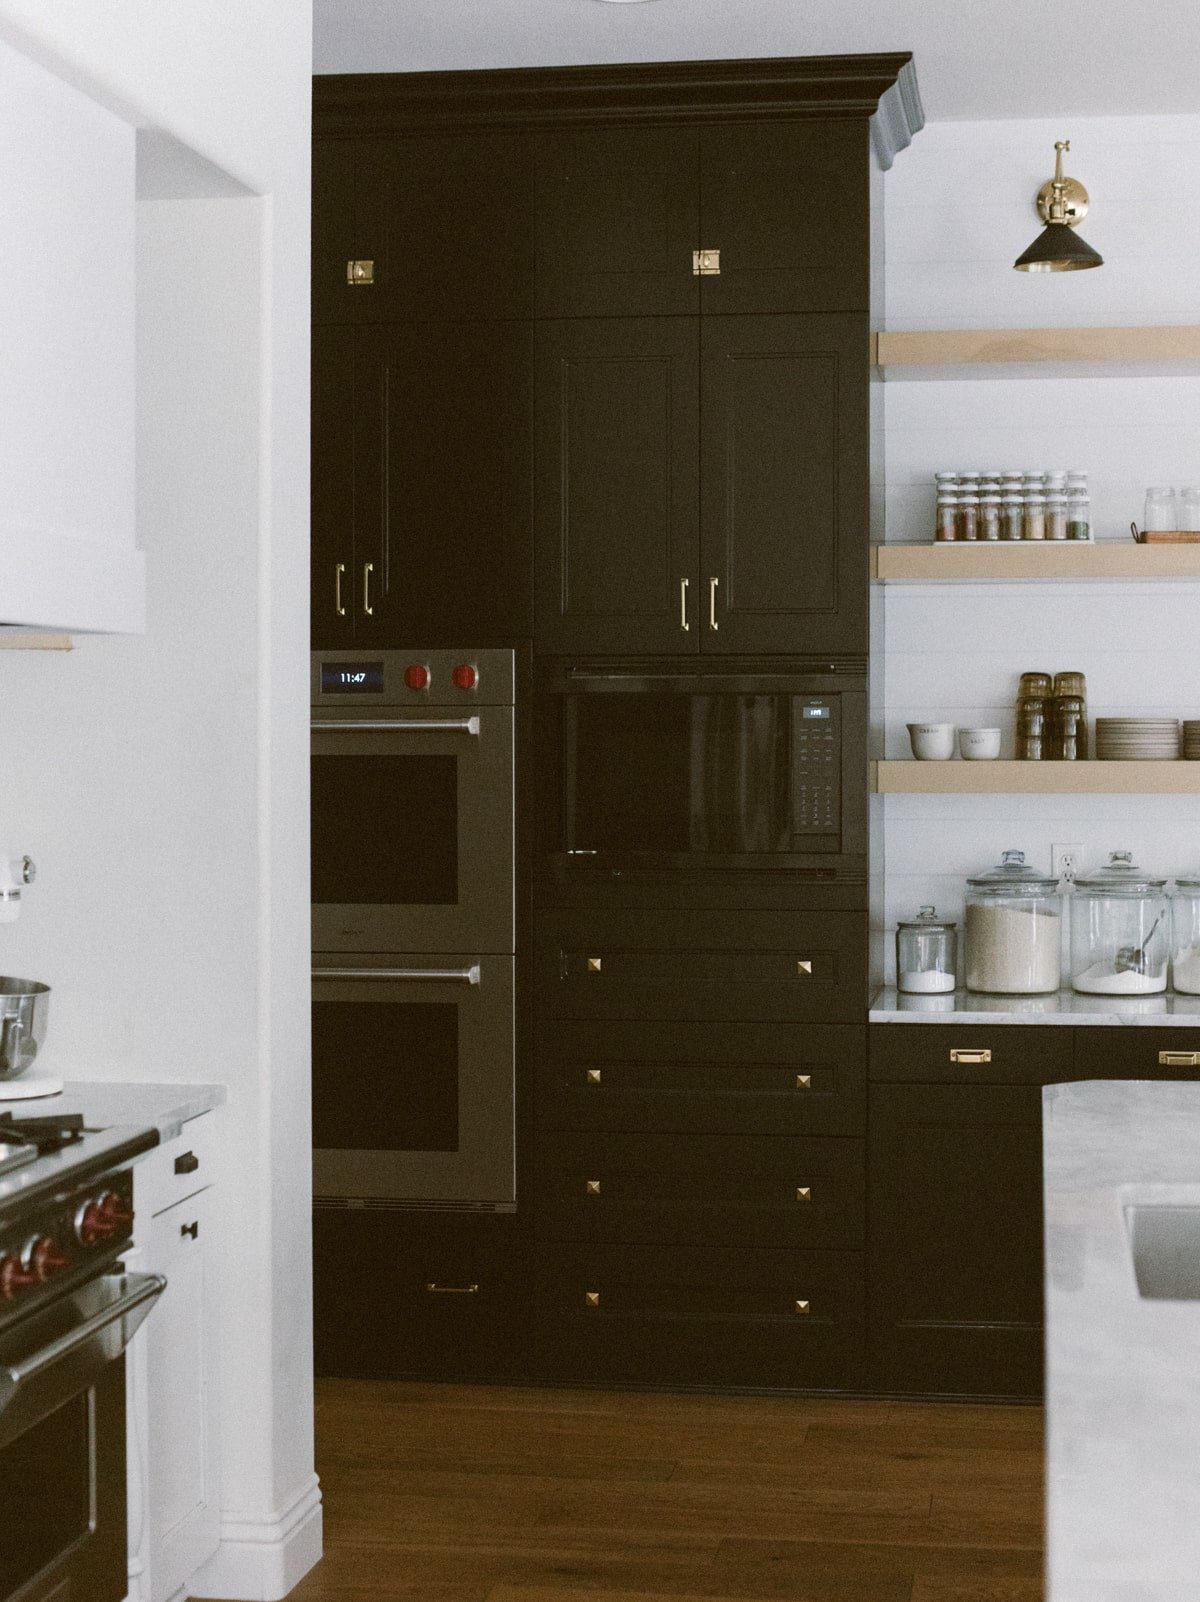
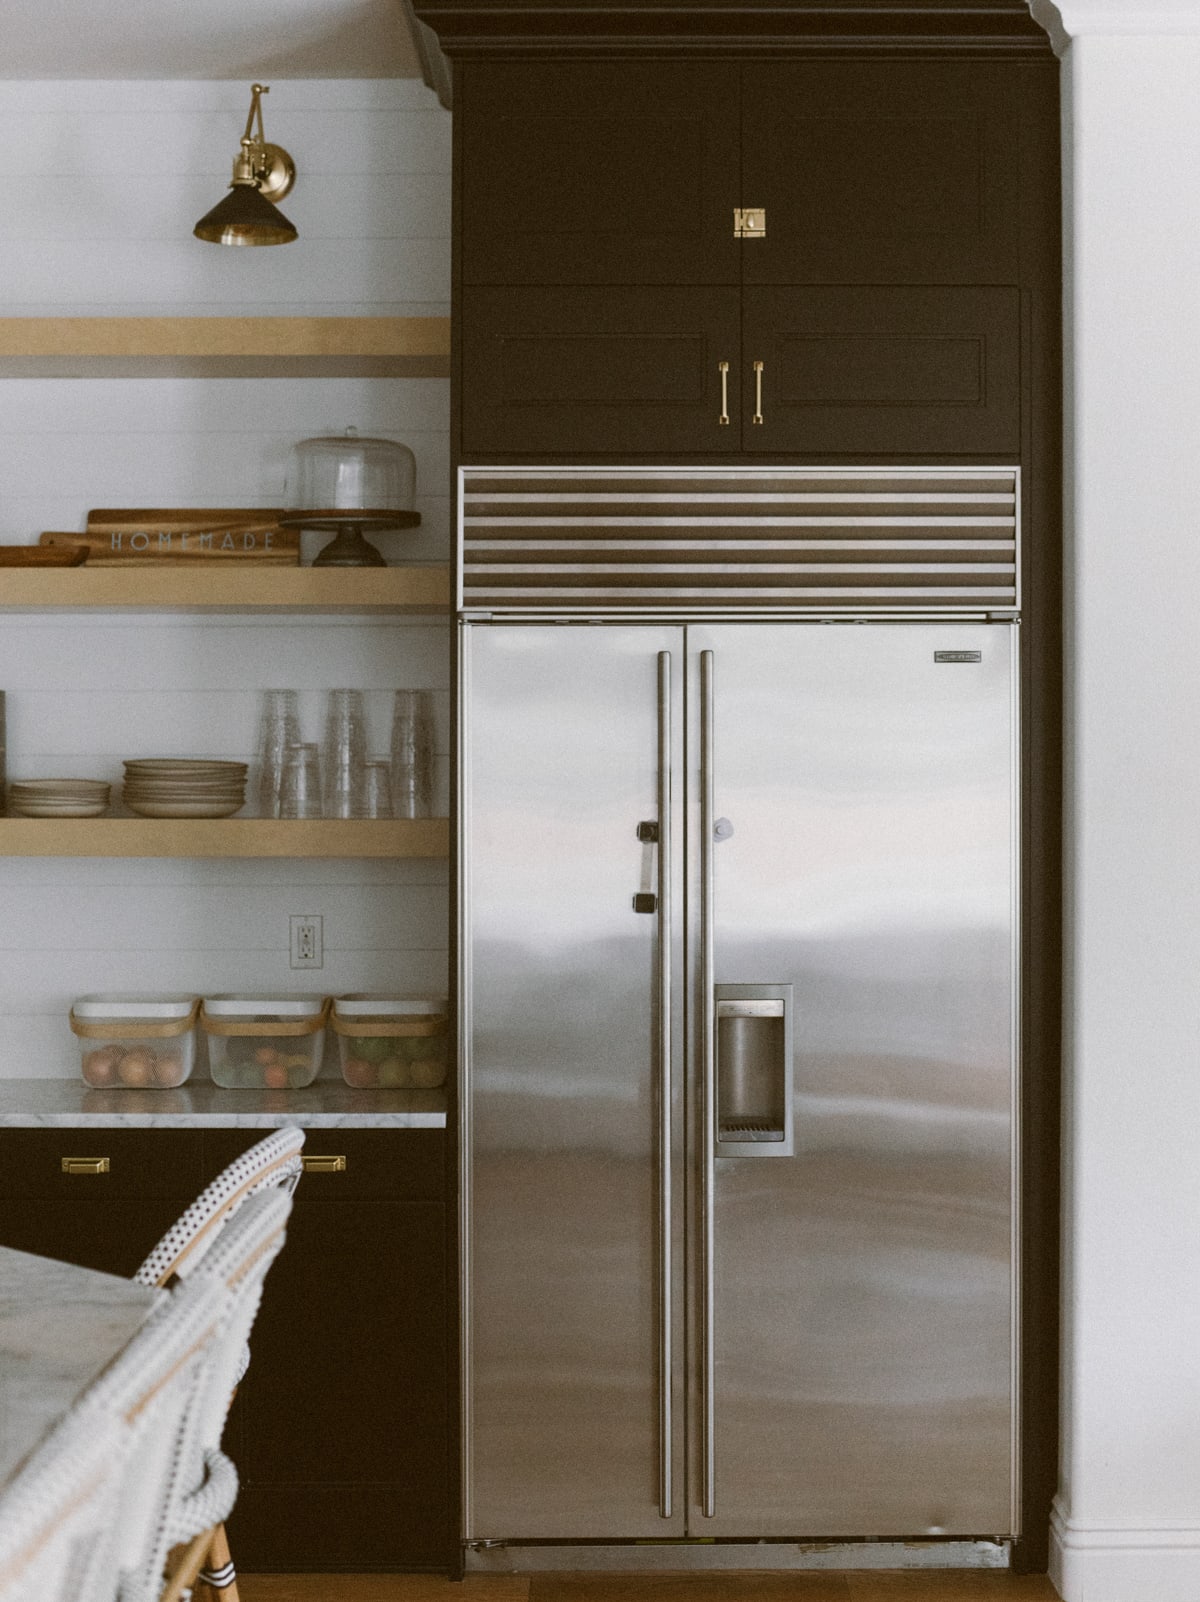
Needless to say, I was SO excited when it was all systems go on project double electric convection ovens. Once the time finally came we knew the PERFECT spot for said ovens. Or so we thought! Neil had measured an opening in our cabinets and he said that the ovens could slide right in there. What he didn’t account for is that the bottom oven door would have slammed onto the ground. So it wasn’t very conducive to optimum functionality. Back to the drawing board.
We thought we would add a cabinet drawer underneath where the bottom oven would be to fix the door problem. But that would create a need for shorter cabinet doors above the oven. Needless to say, once we got going it was just a total domino effect! We hired a contractor and designer and decided on these options moving forward.
Mini kitchen remodel options
Option 1: We could shorten the two existing cabinets above the ovens and build the drawer underneath so that the ovens would sit at a proper height. But then we would have to match the white cabinets to the rest of the cabinets that were already in the kitchen.
Option 2: We could do all new cabinets on that side of the kitchen but that would be MEGA expensive. We couldn’t just replace the doors either because the sides of the cabinets were showing as well!
Option 3: Paint the existing cabinets and only add on the two new cabinet doors above the ovens and the drawer below them.
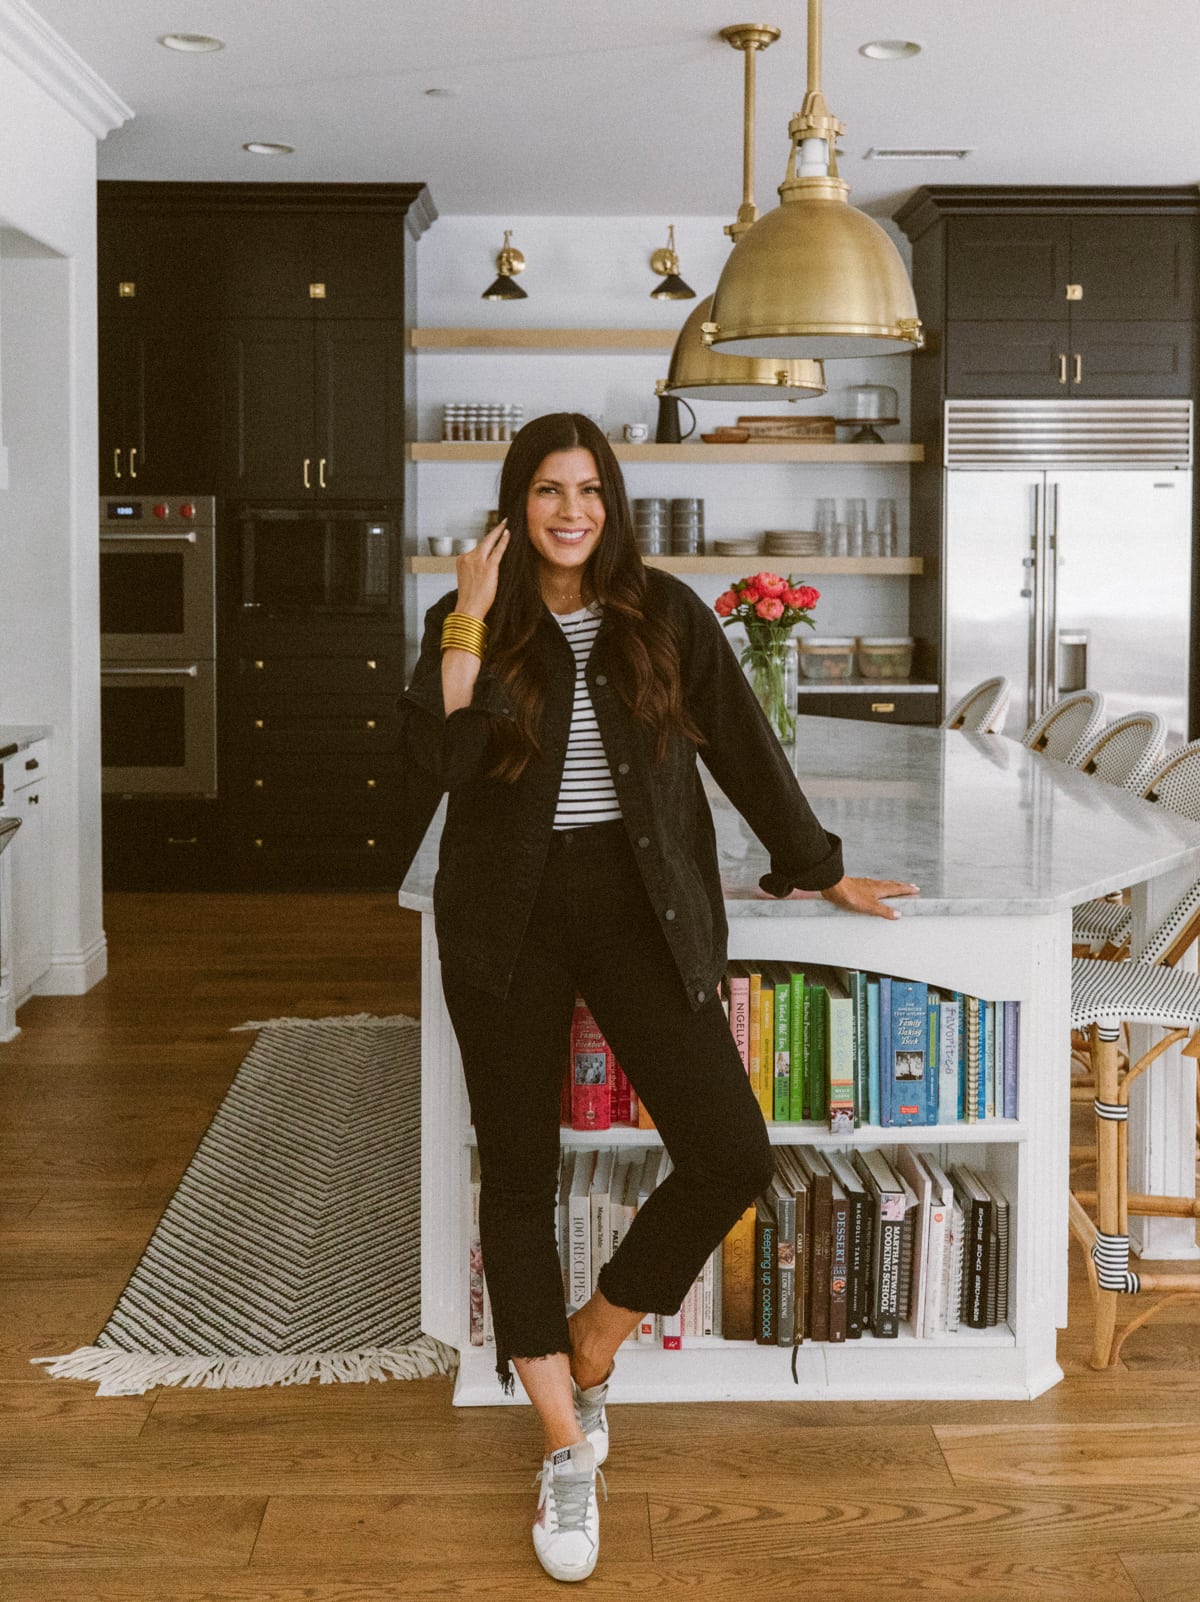
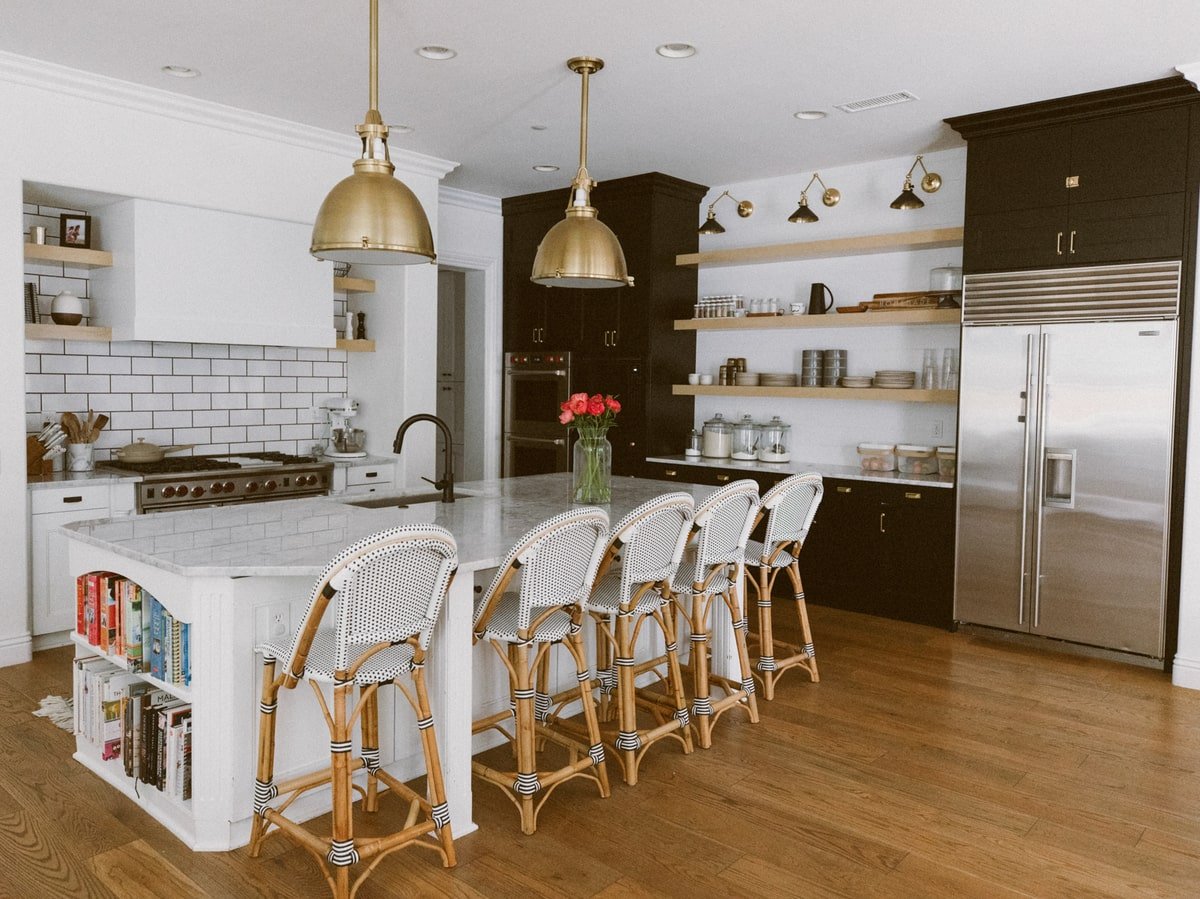
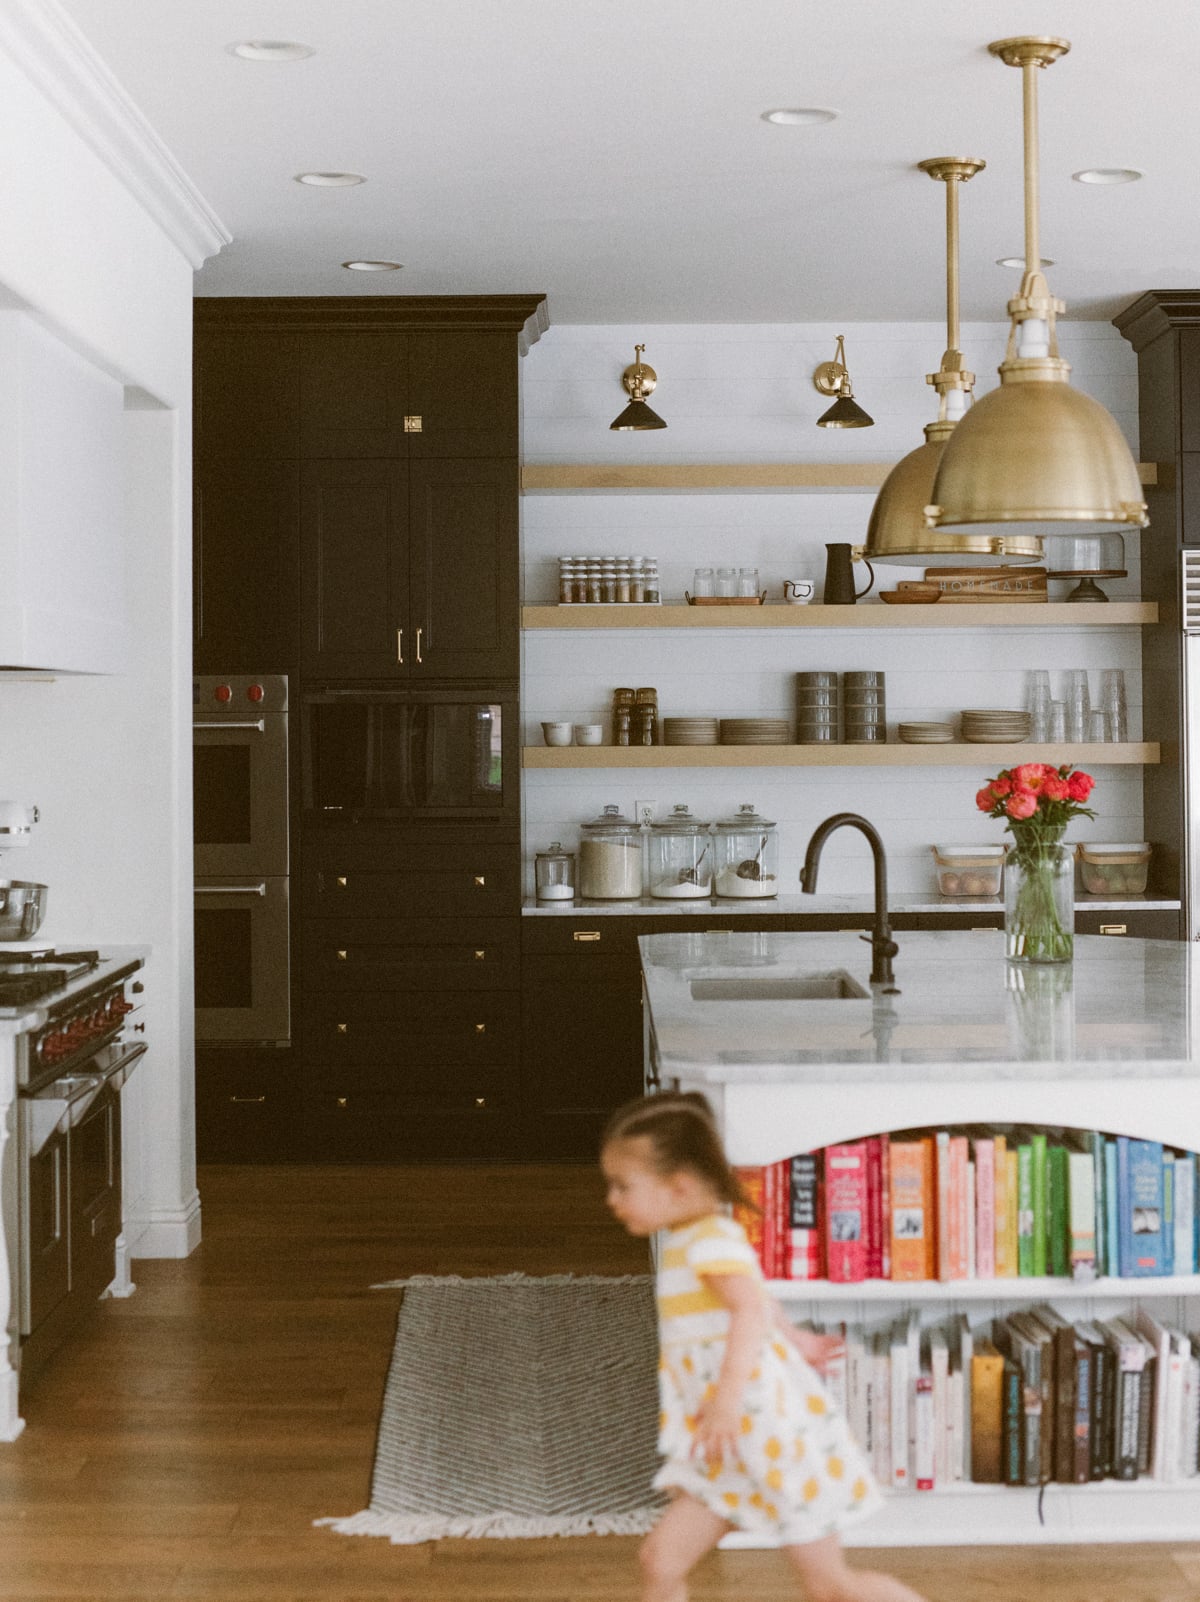
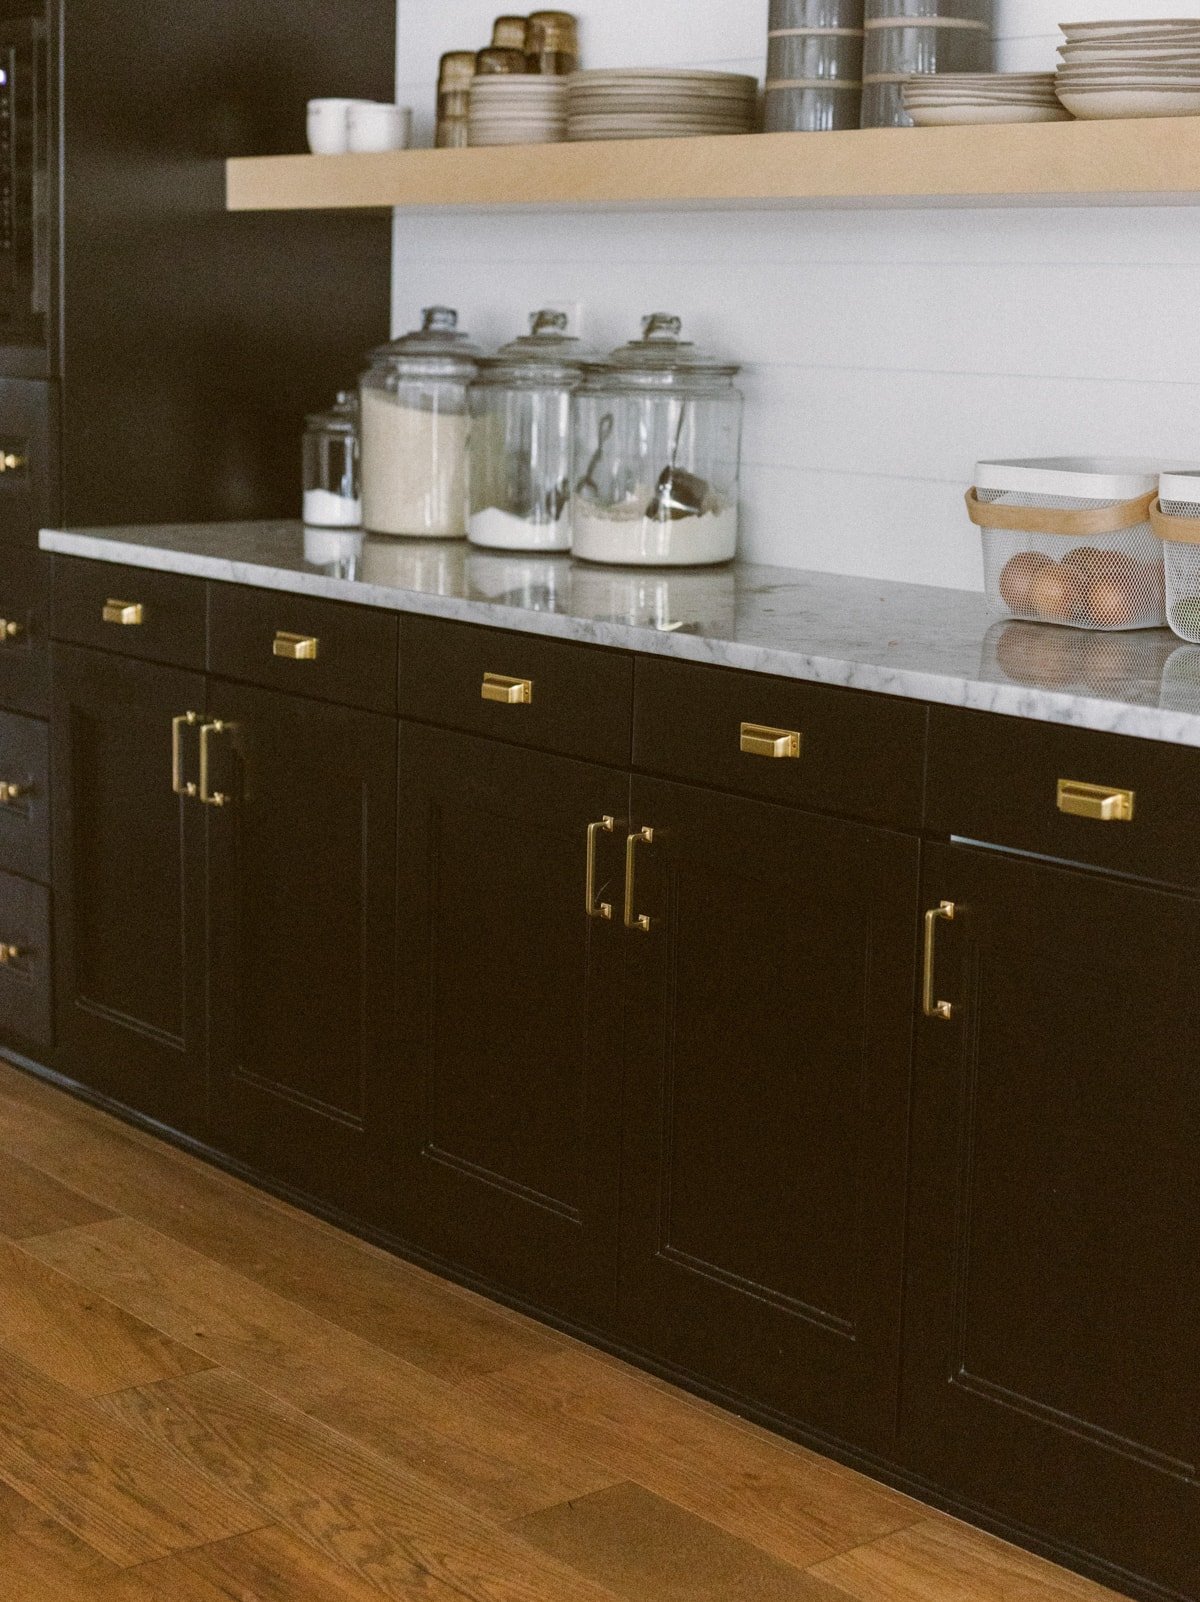
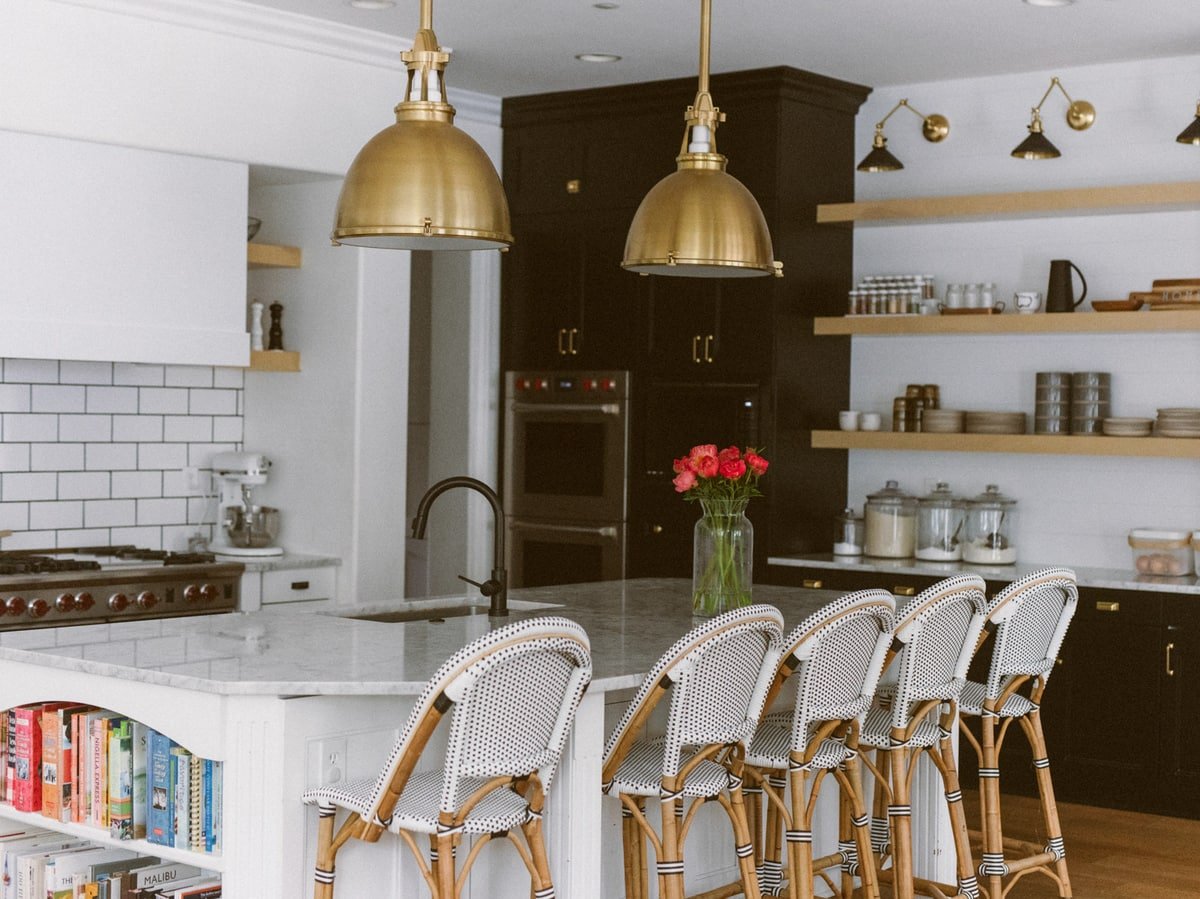
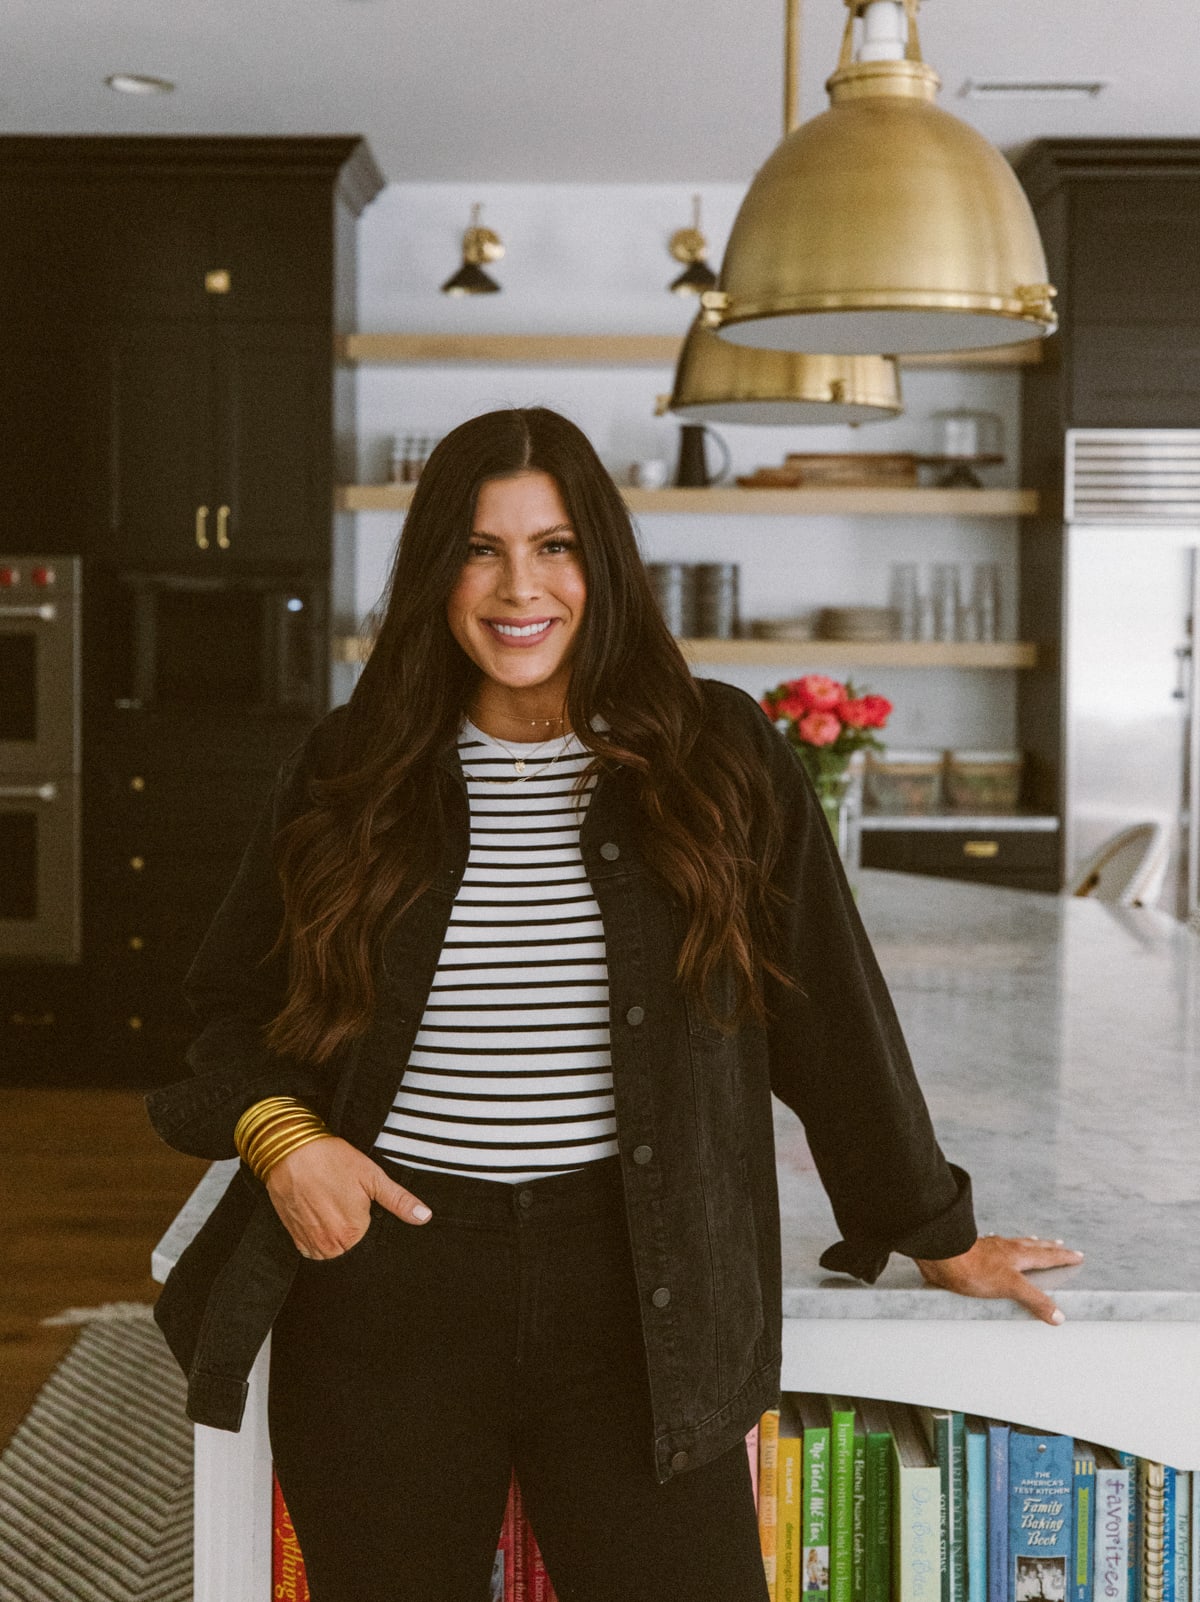
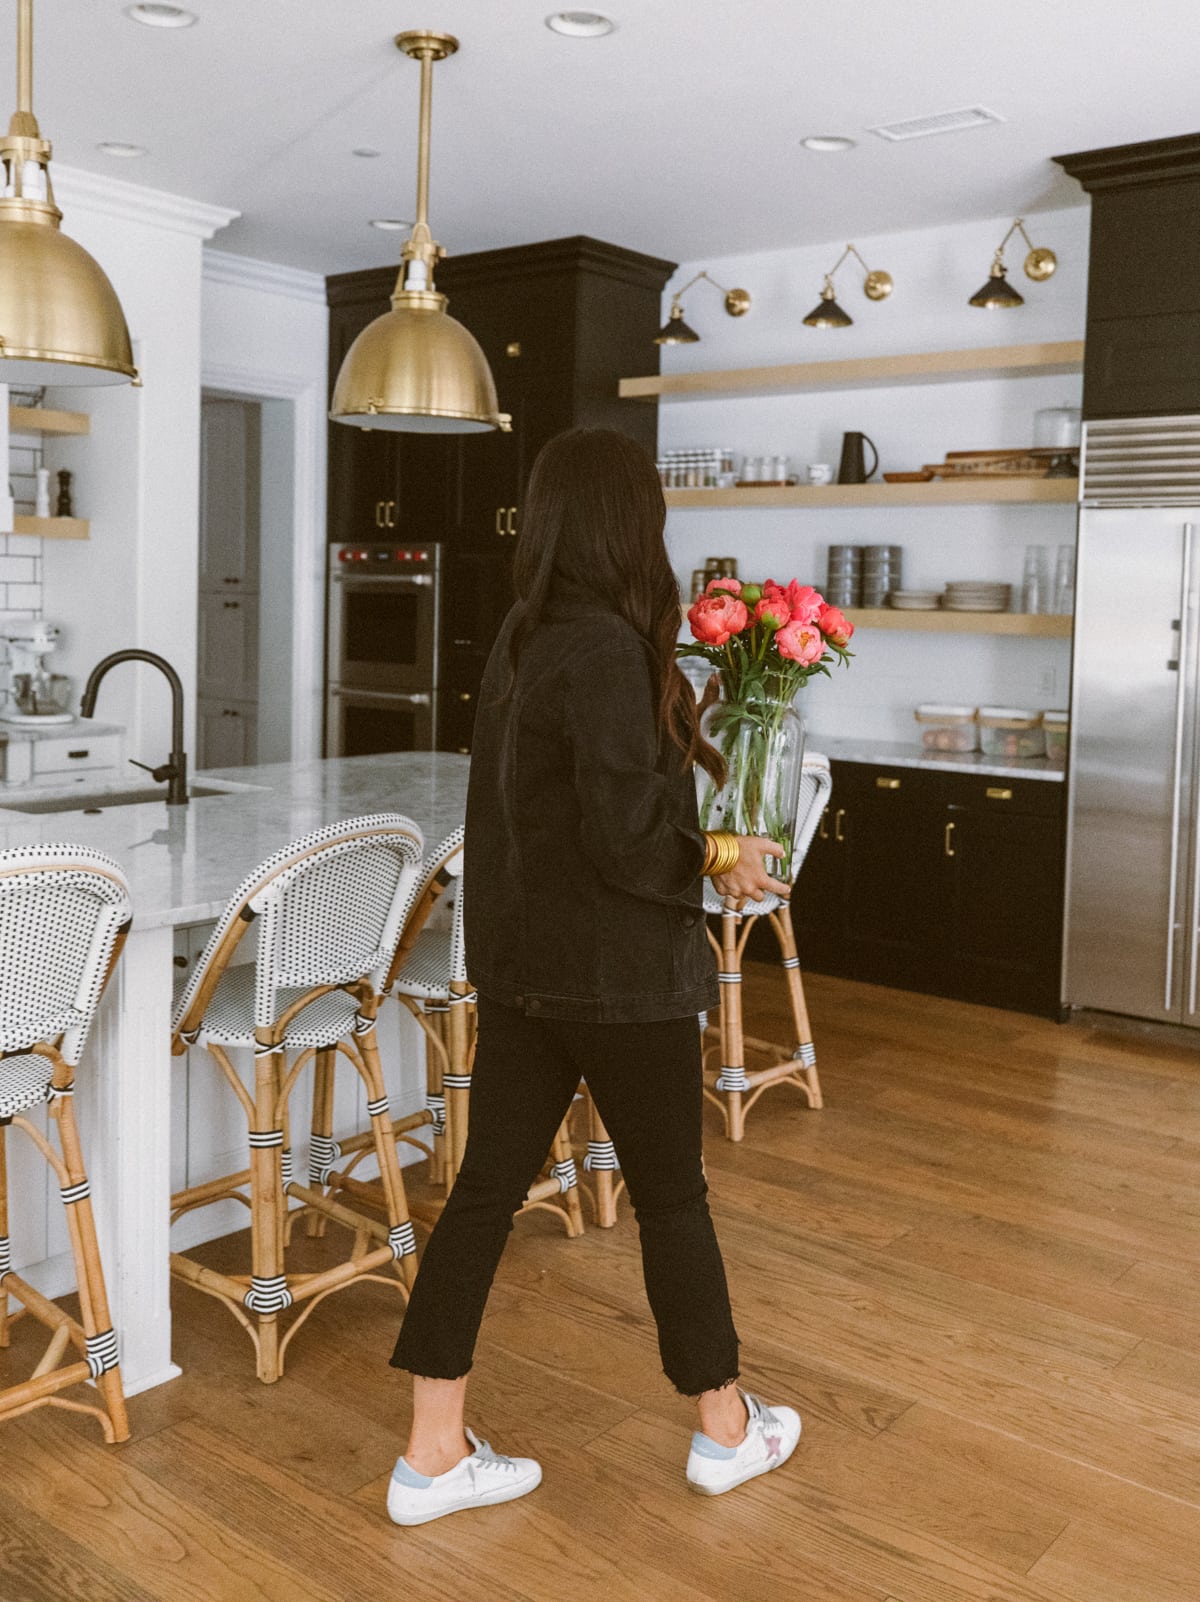
We (obviously!) chose option 3, and I’m so happy we did. I love how the dark cabinets give the kitchen some contrast now, and it was such a cost-effective way to change things up without having to spend tens of thousands on new cabinets.
From white to dark cabinets
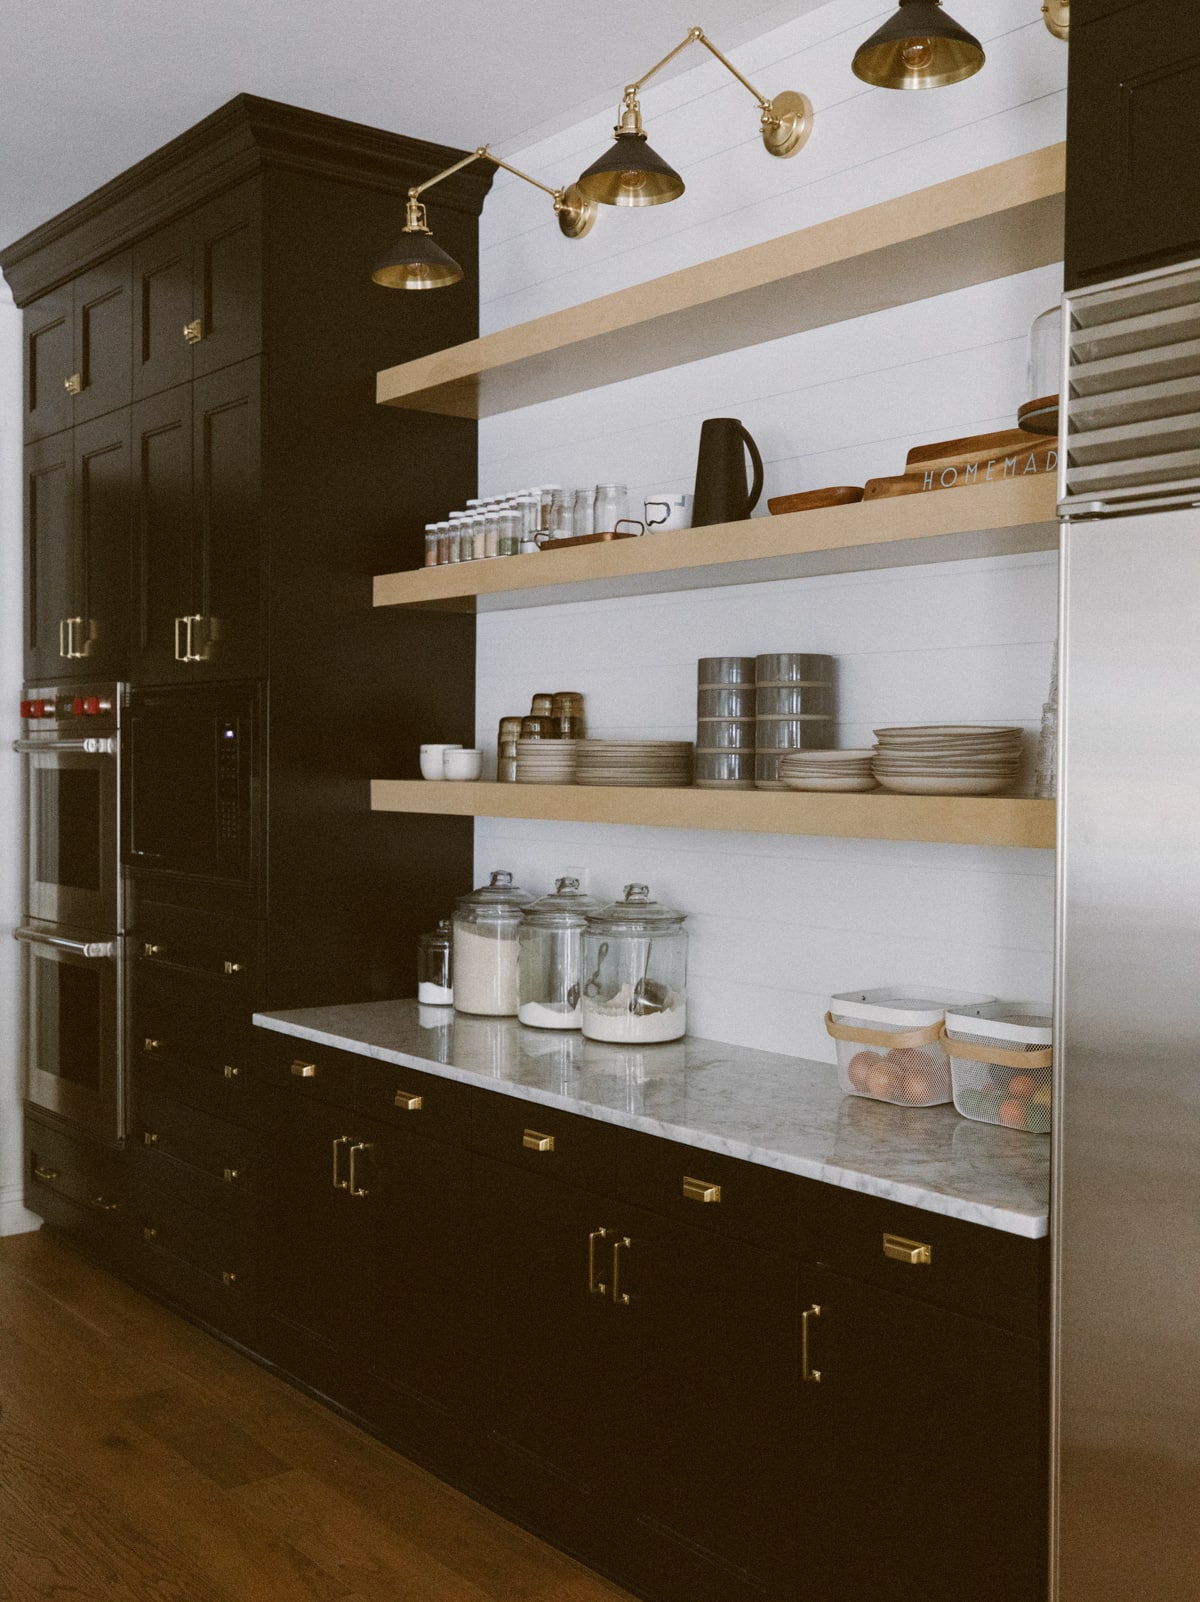
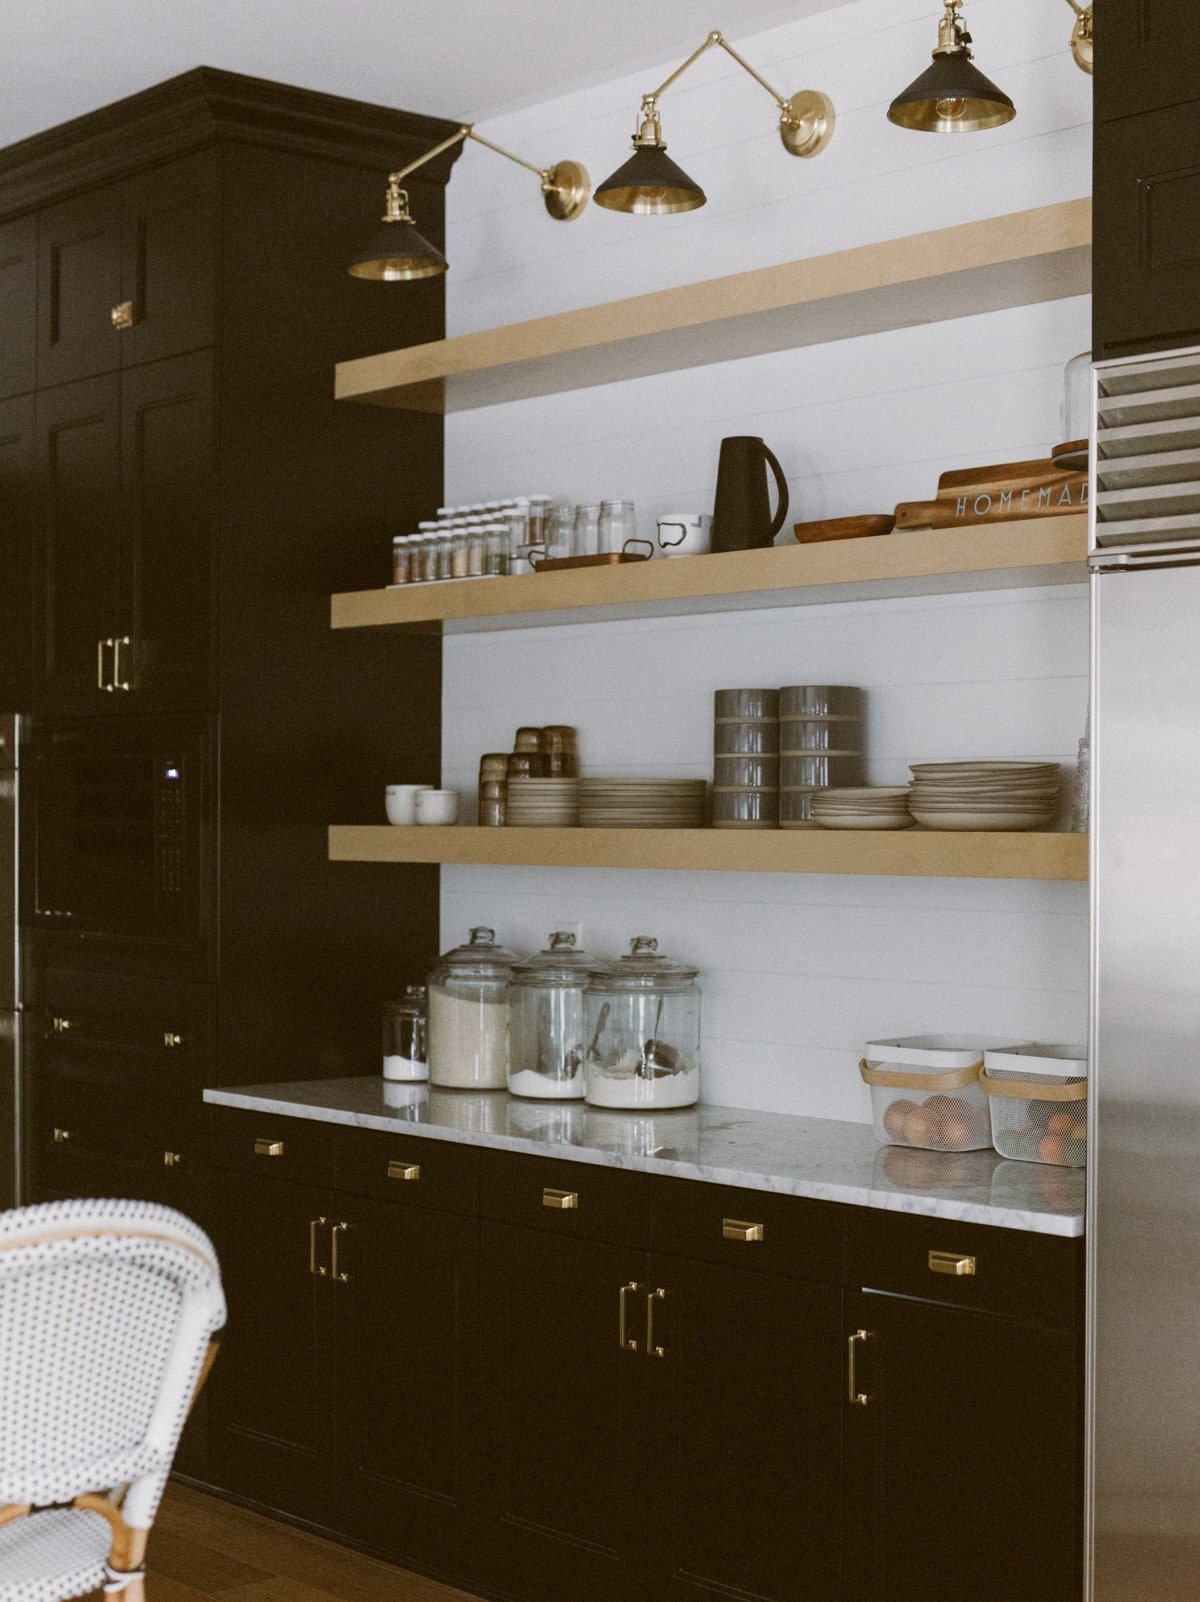
Once we decided to keep our existing cabinets, I was really itching to do something new with them. I had this idea to bring a little bit of contrast into our all-white kitchen, so I knew I wanted to do either black or natural wood on the wall where the ovens would go.
Natural wood would involve getting all new cabinets so we decided to paint the ones that were already in the kitchen! We painted all the cabinets just on the one wall of the kitchen and it makes such a modern, fun impact!!
Faux cabinets
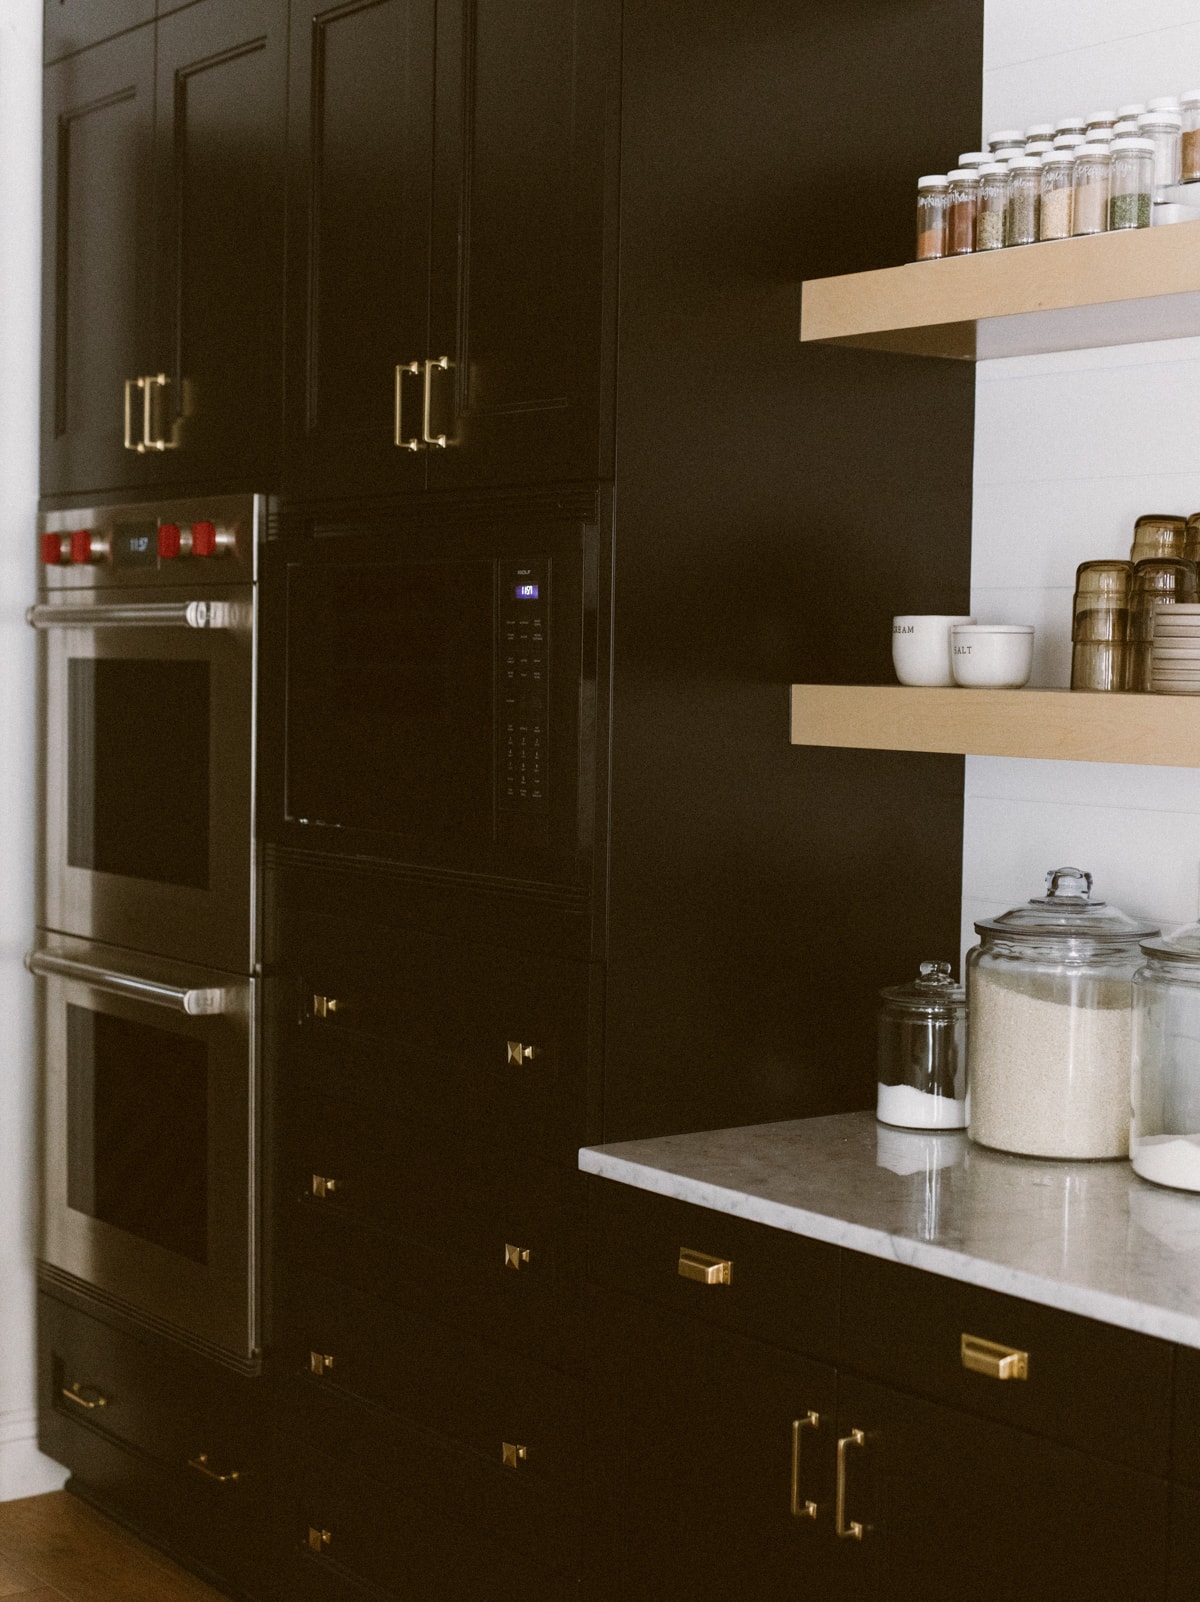
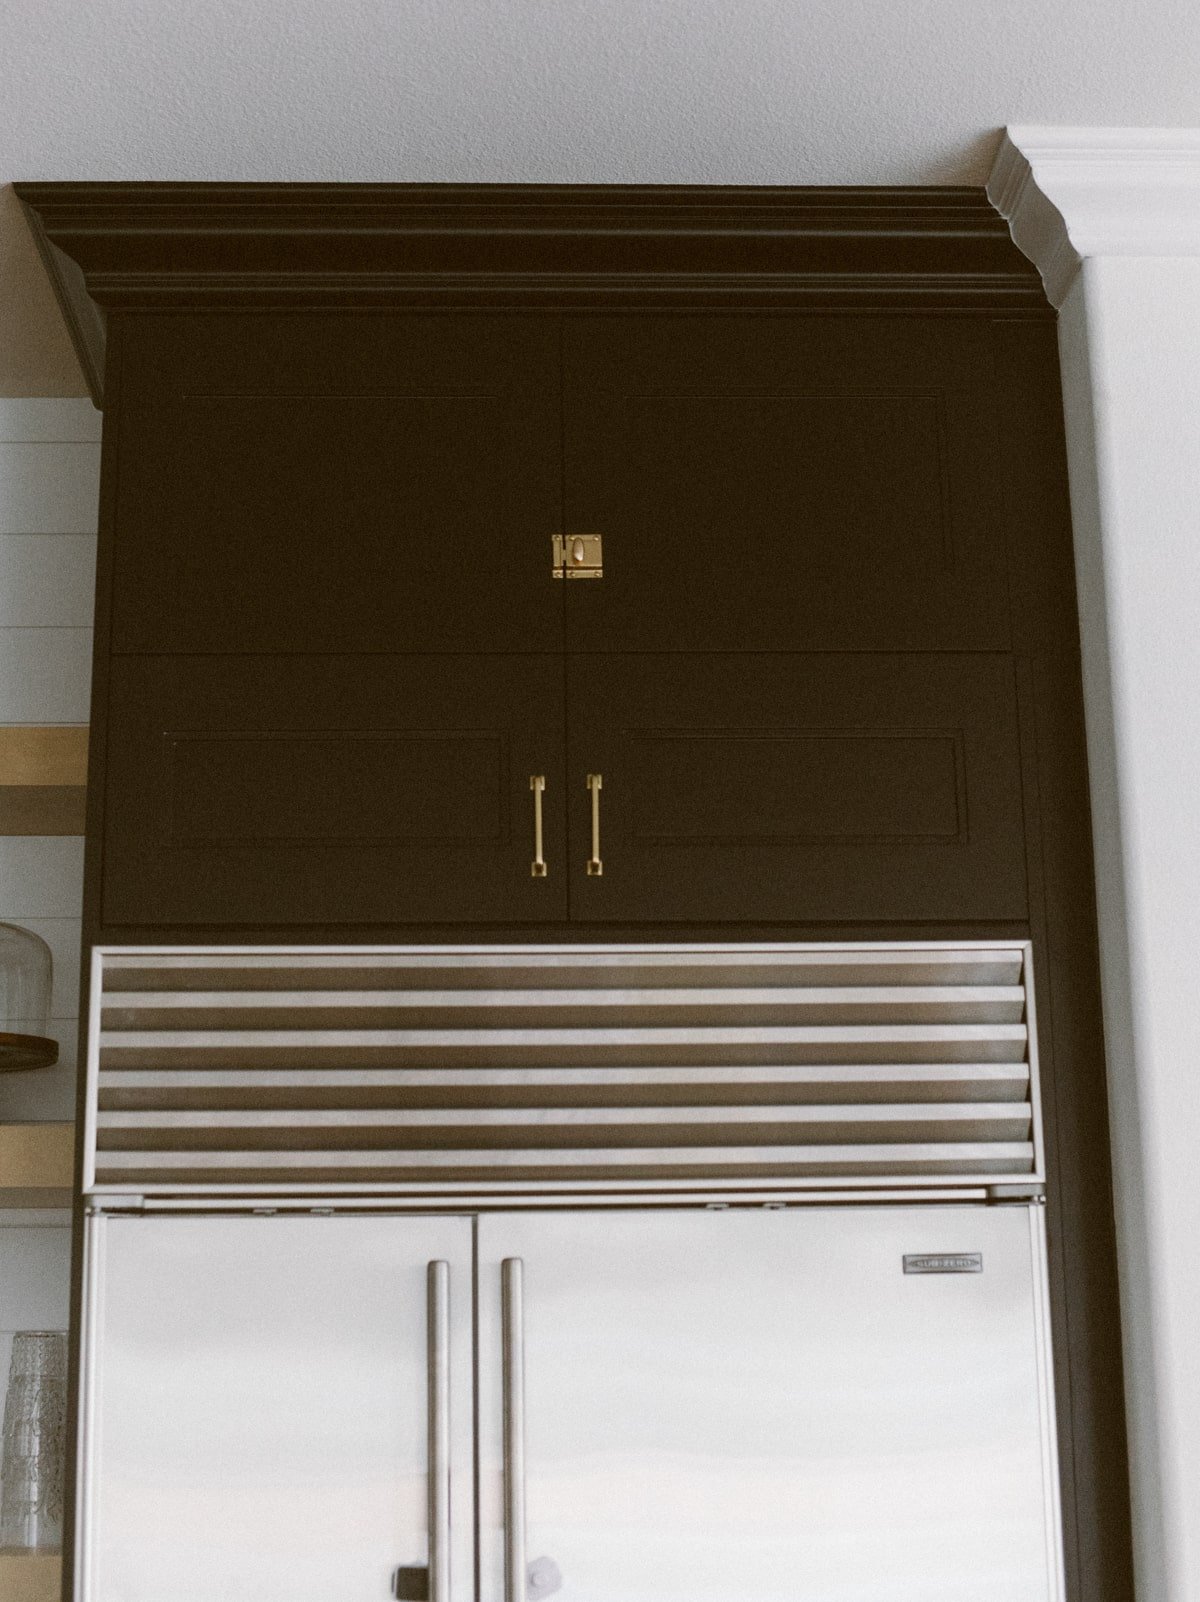
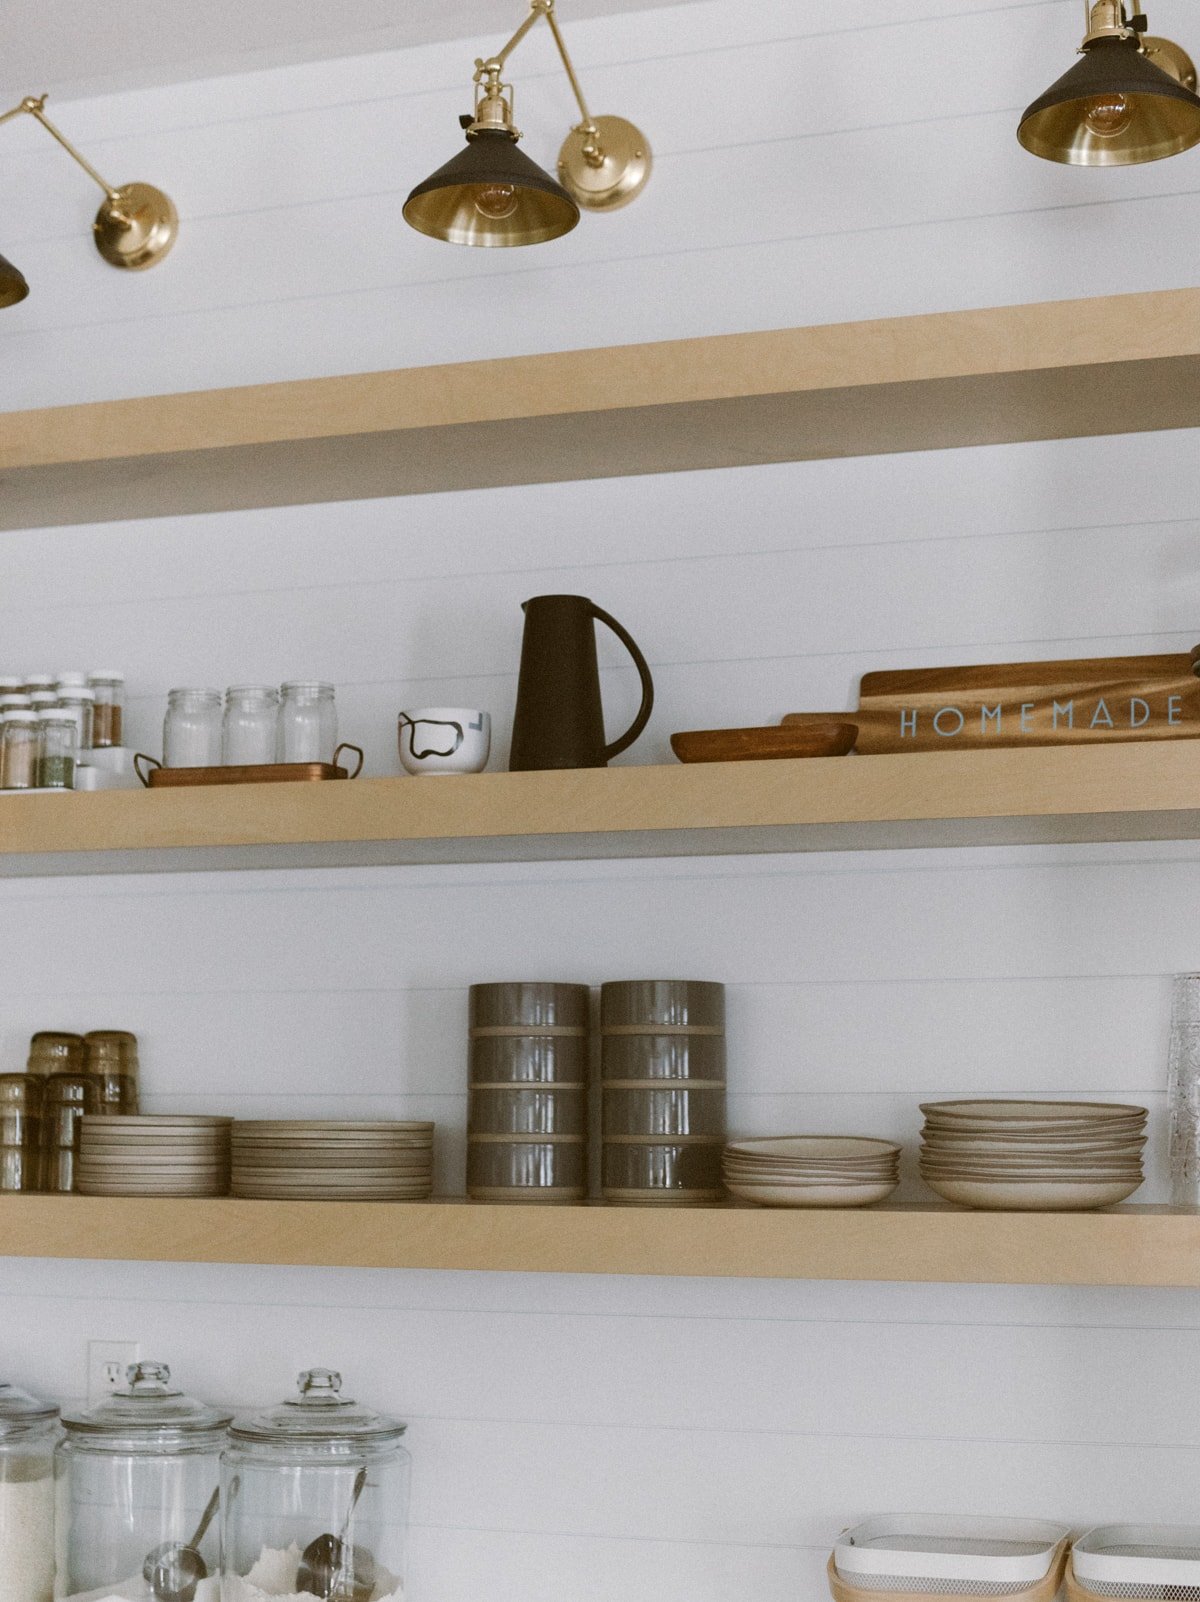
I also REALLY wanted the cabinets to go to the ceiling. I LOVE this look! In our old house we actually never used these cabinets because they are SO high up (even for two very tall people!) and hard to keep anything in, let alone heavy stuff. This is where the idea of FAUX CABINETS came in! This cut our cost way down because our cabinet guy just made a wood box with doors to take it to the ceiling.
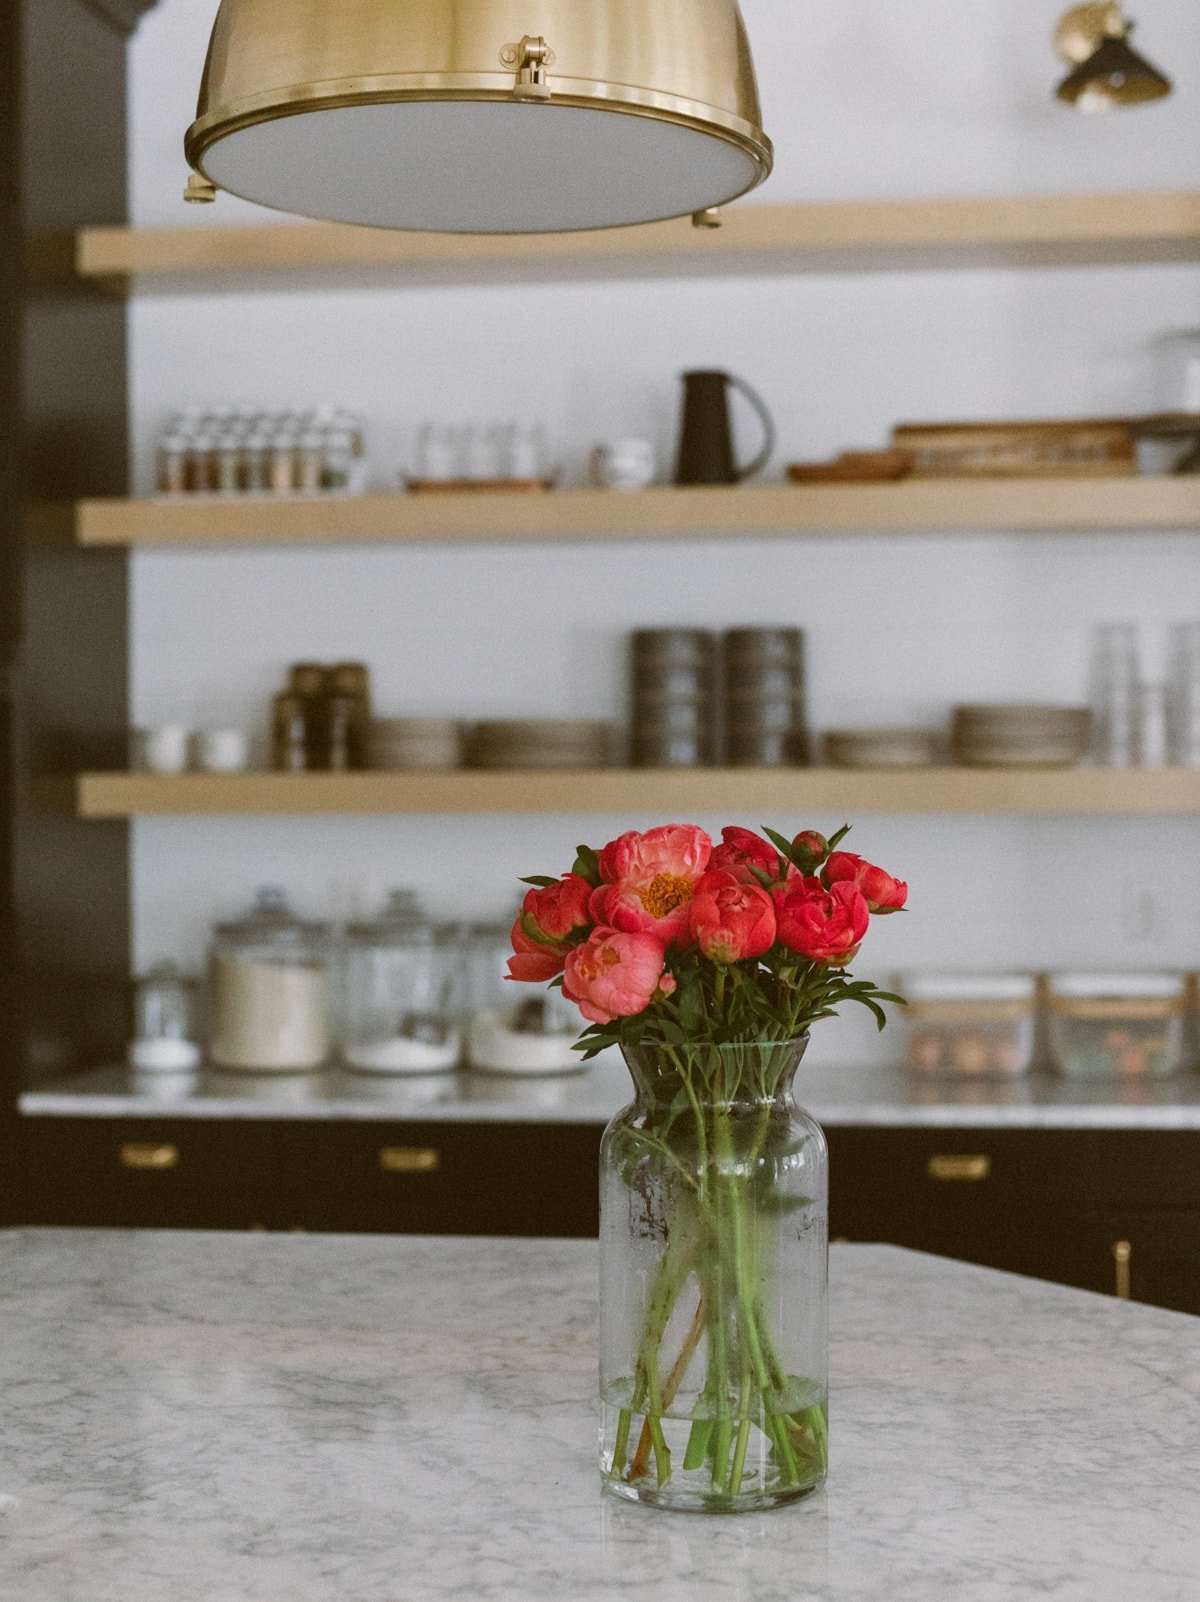
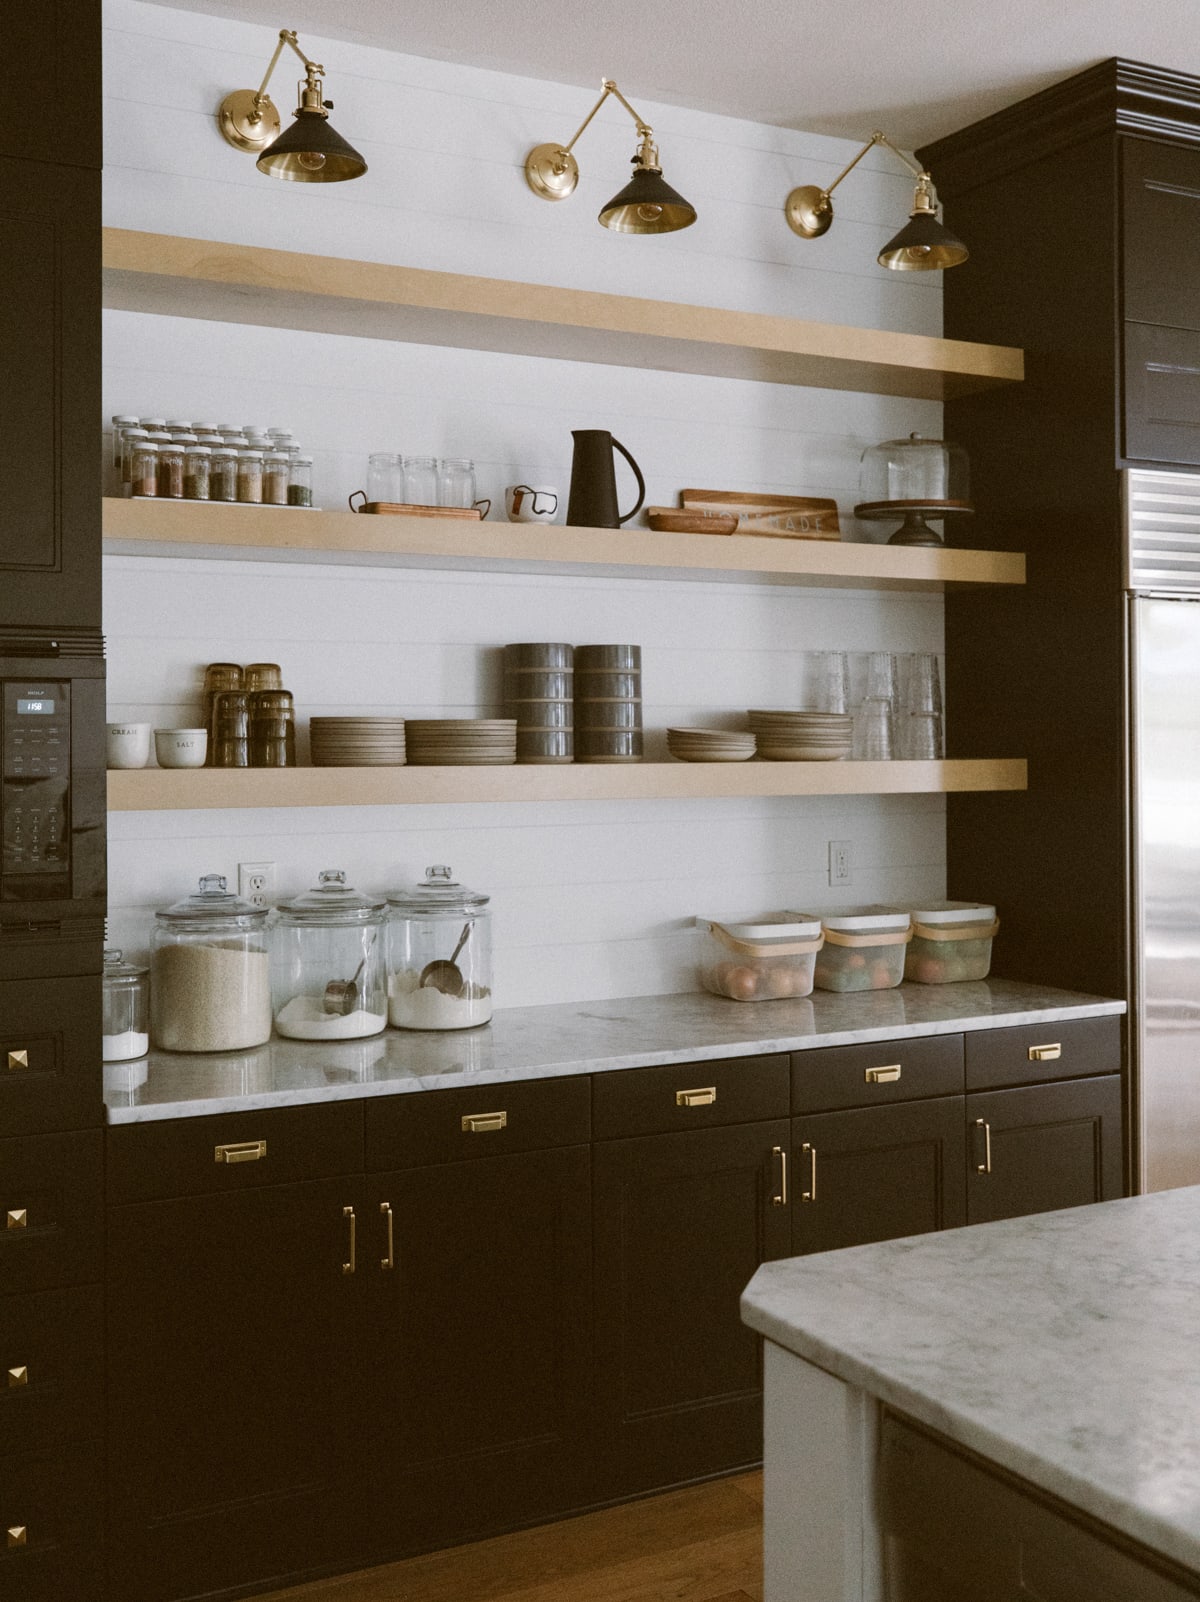
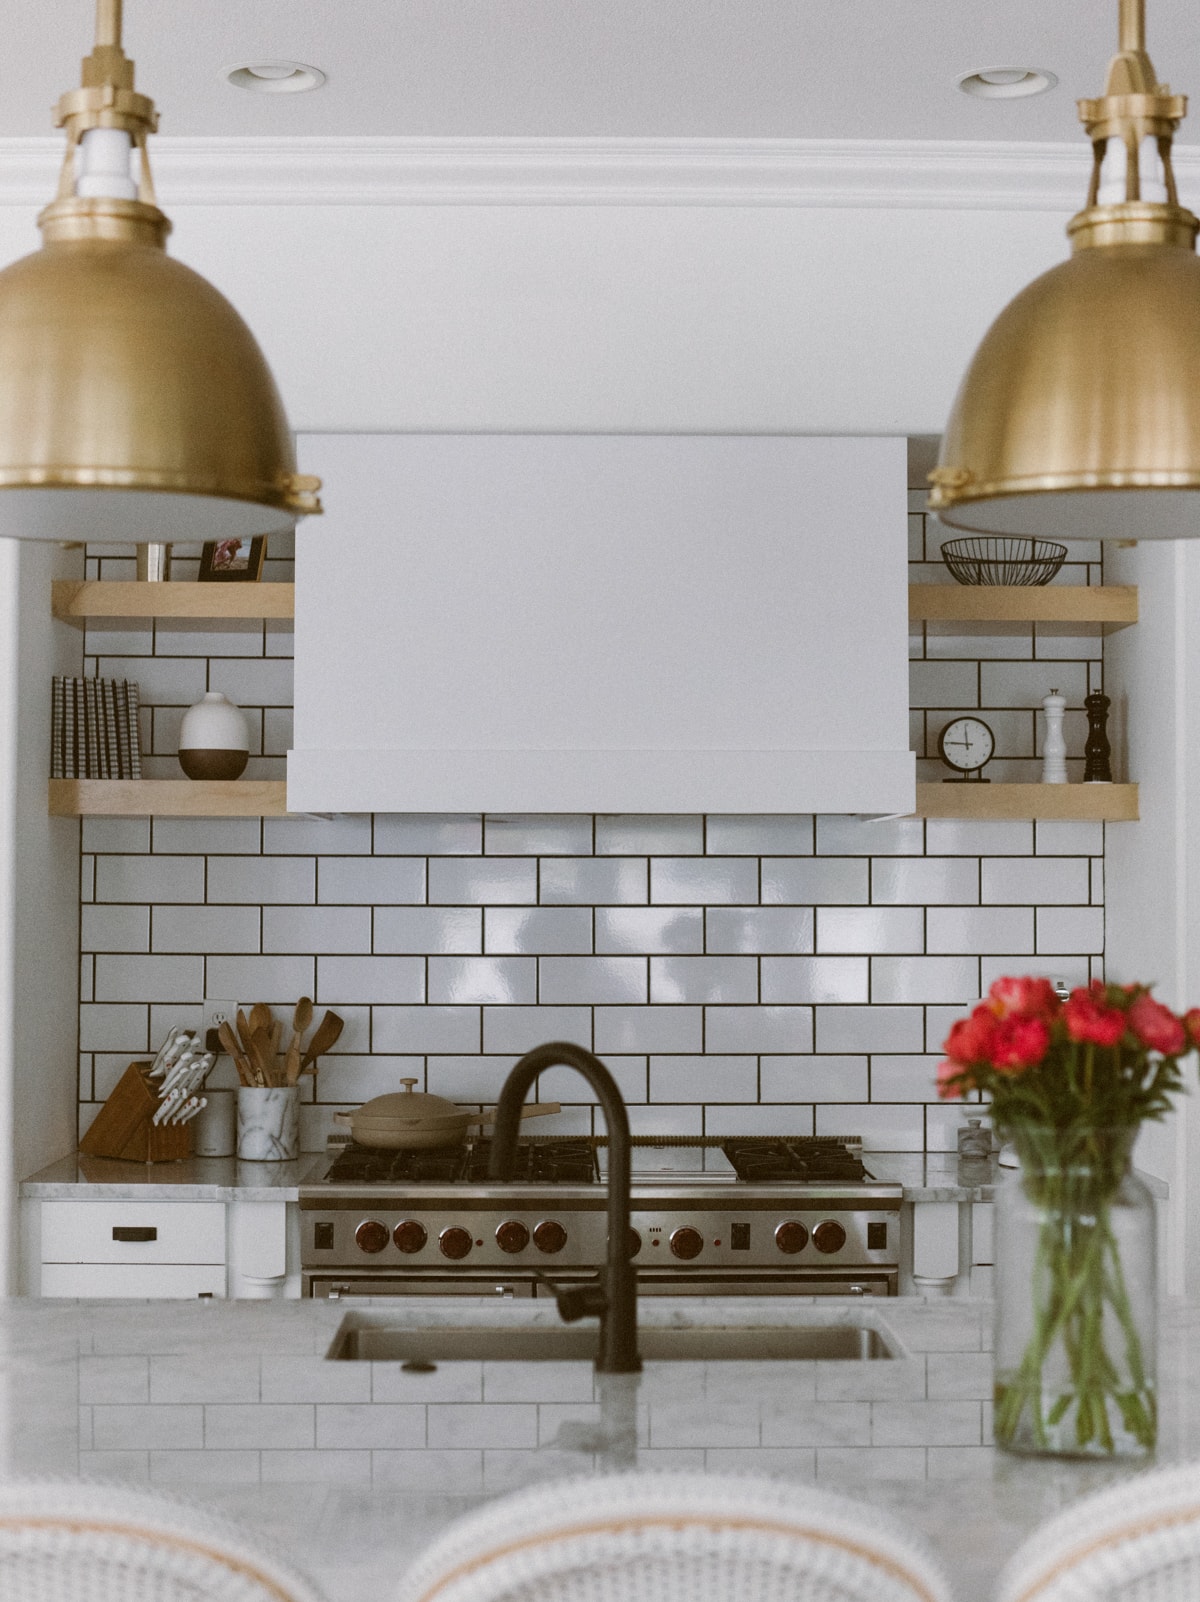
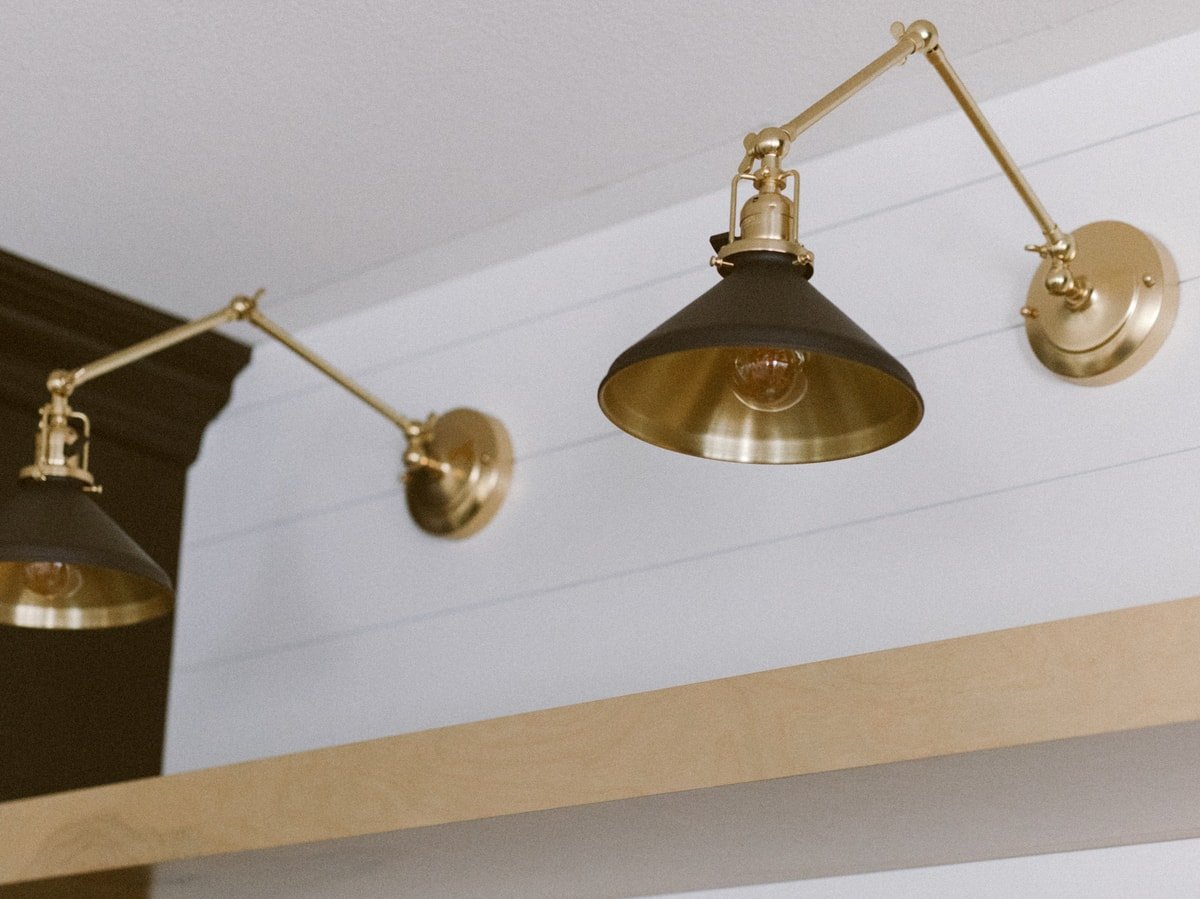
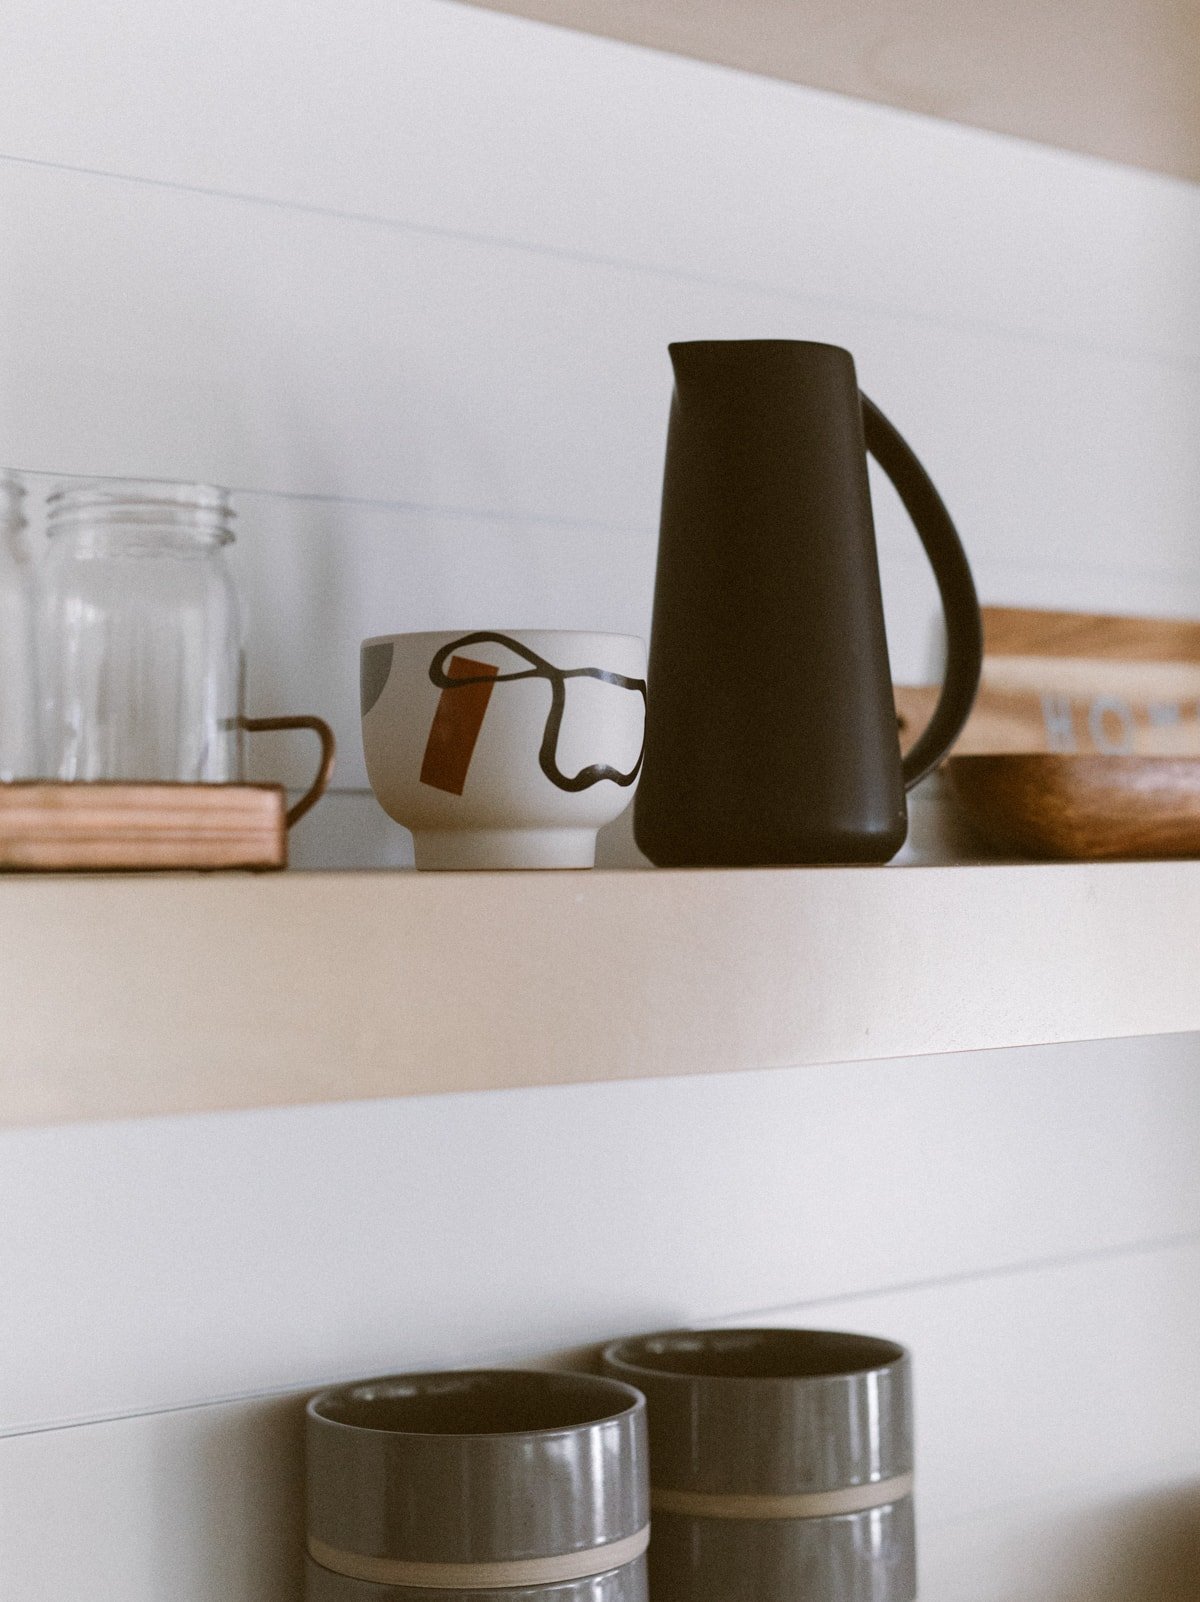
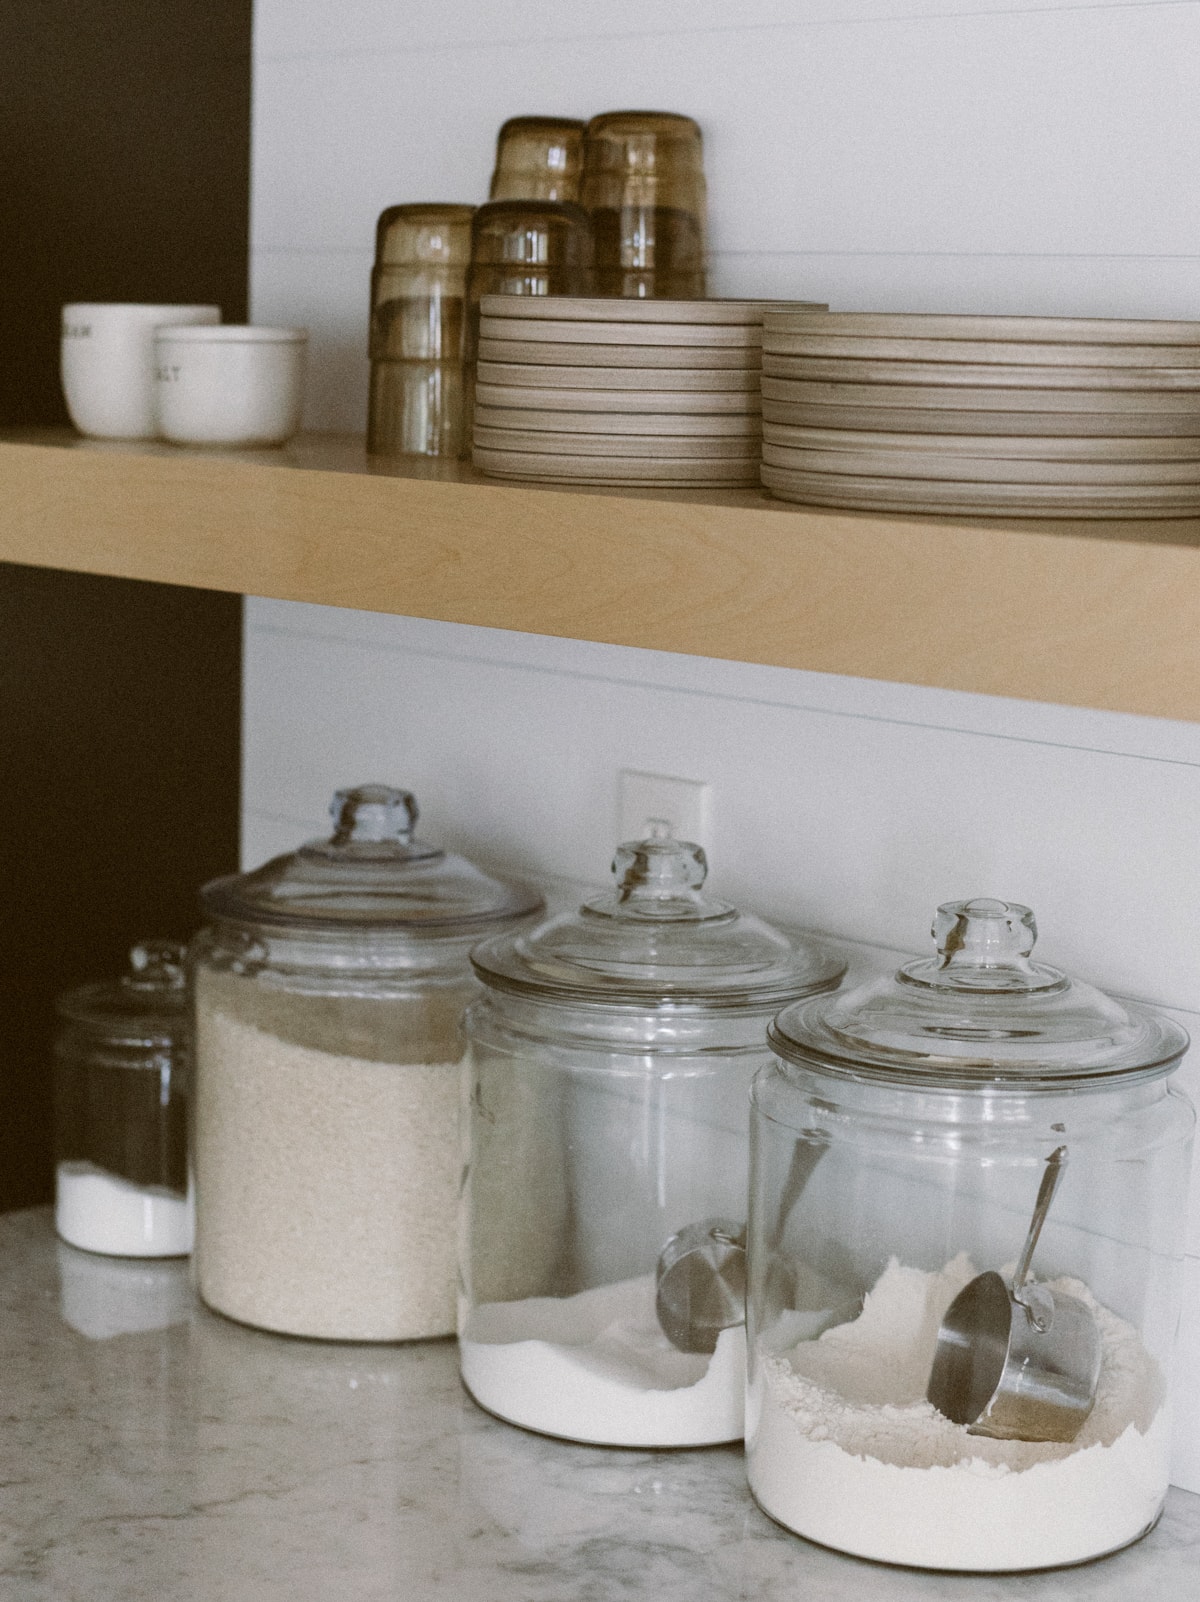
Open shelving
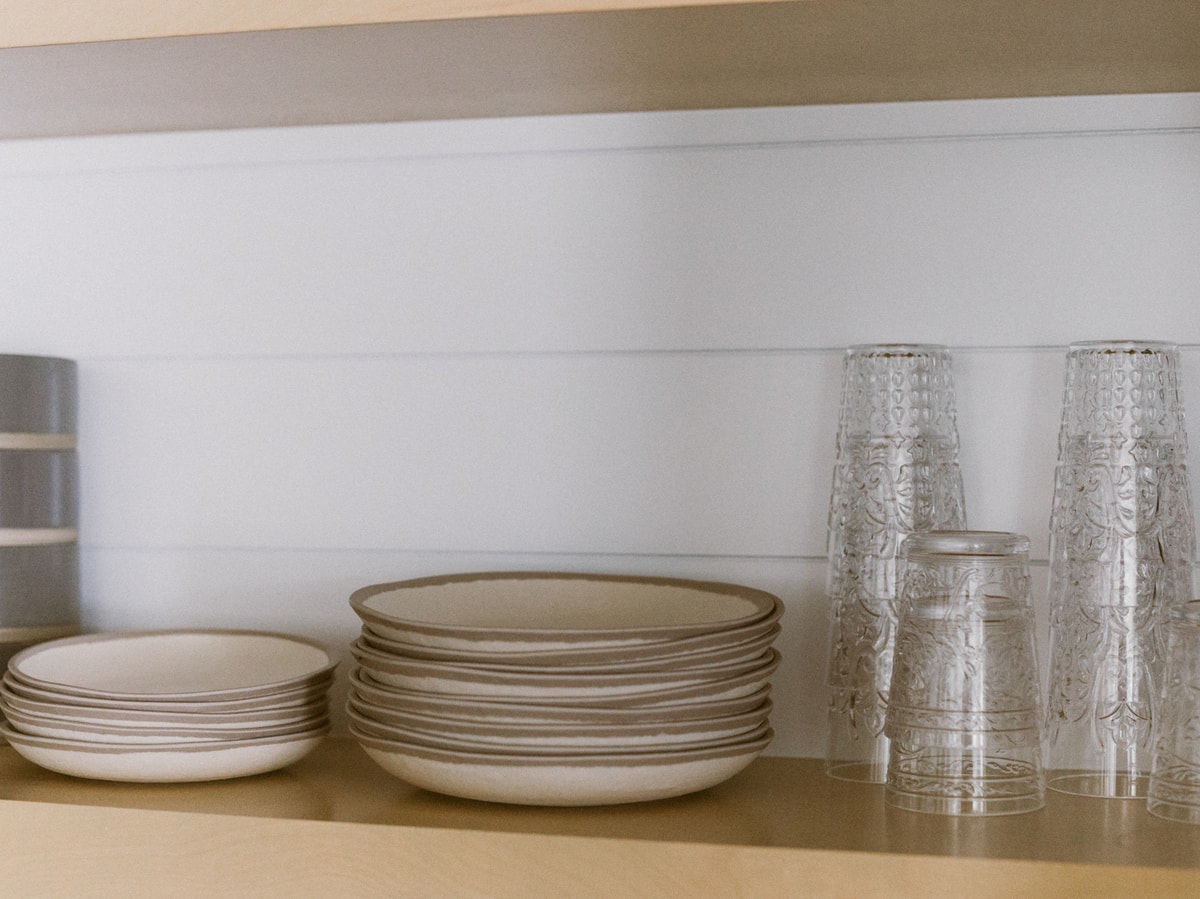
I really wanted open shelving like in our old kitchen. I looove the look of natural wood so I wanted to make sure to incorporate it into our mini makeover! The finish that we did on the shelving was a matte, clear finish. I did not want the shelves to be shiny and I wanted the sealant to change the color of the natural wood as little as possible. I love how it turned out and I think it’s the perfect addition to the white and black!
By bringing the cabinets up to the ceiling and incorporating open shelving where there used to be cabinets I feel like it makes our kitchen feel SO much bigger! We are totally utilizing the natural height of our ceilings and we still have tons of storage.
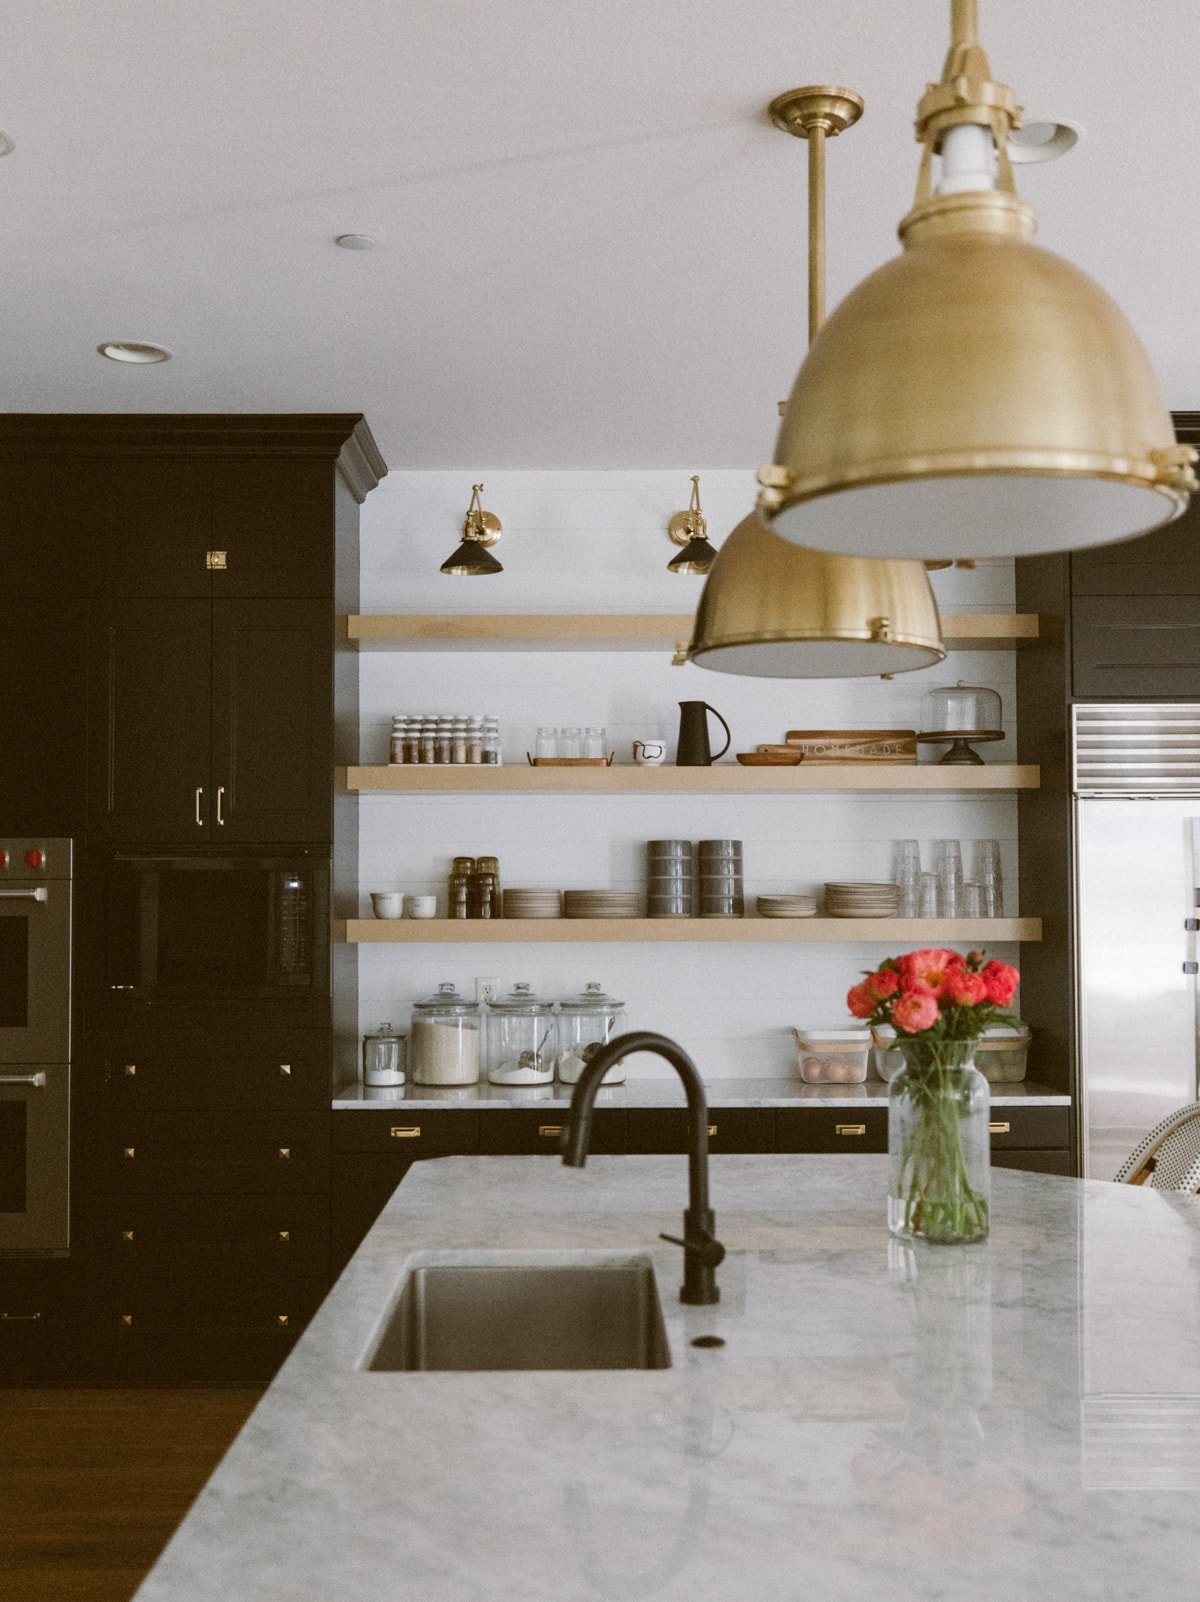
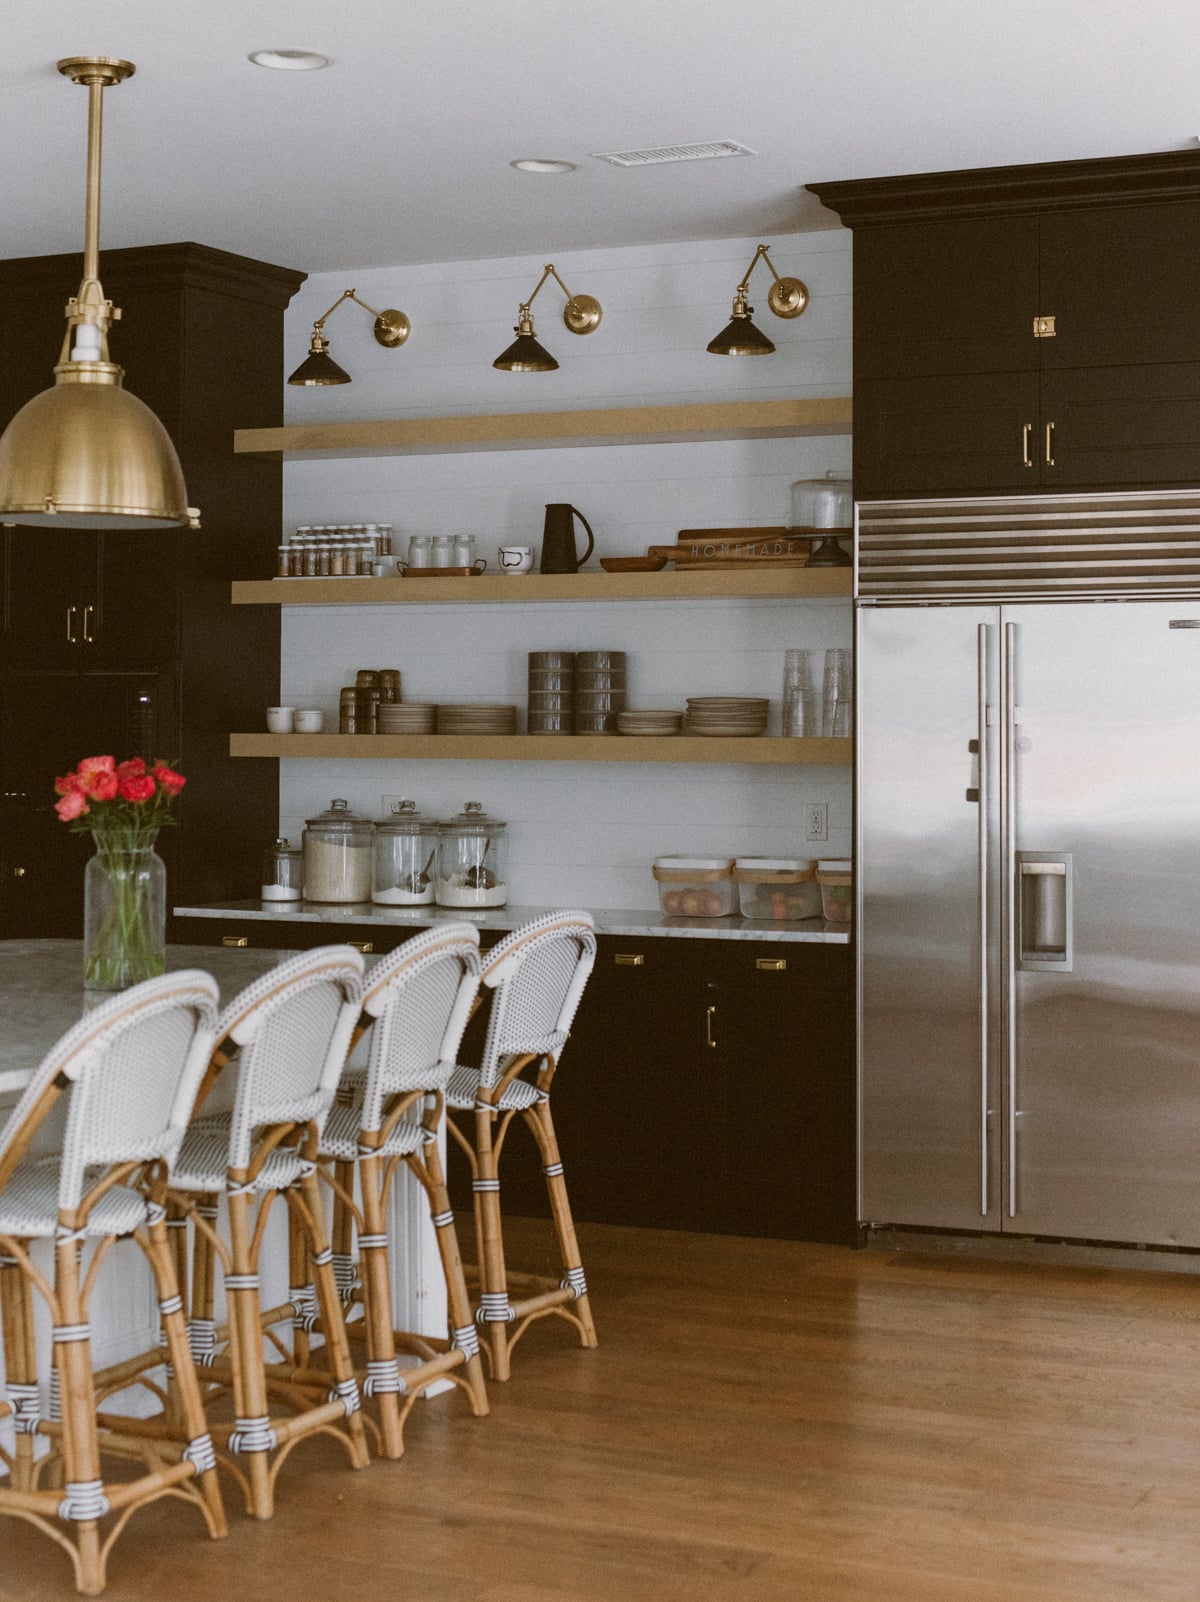
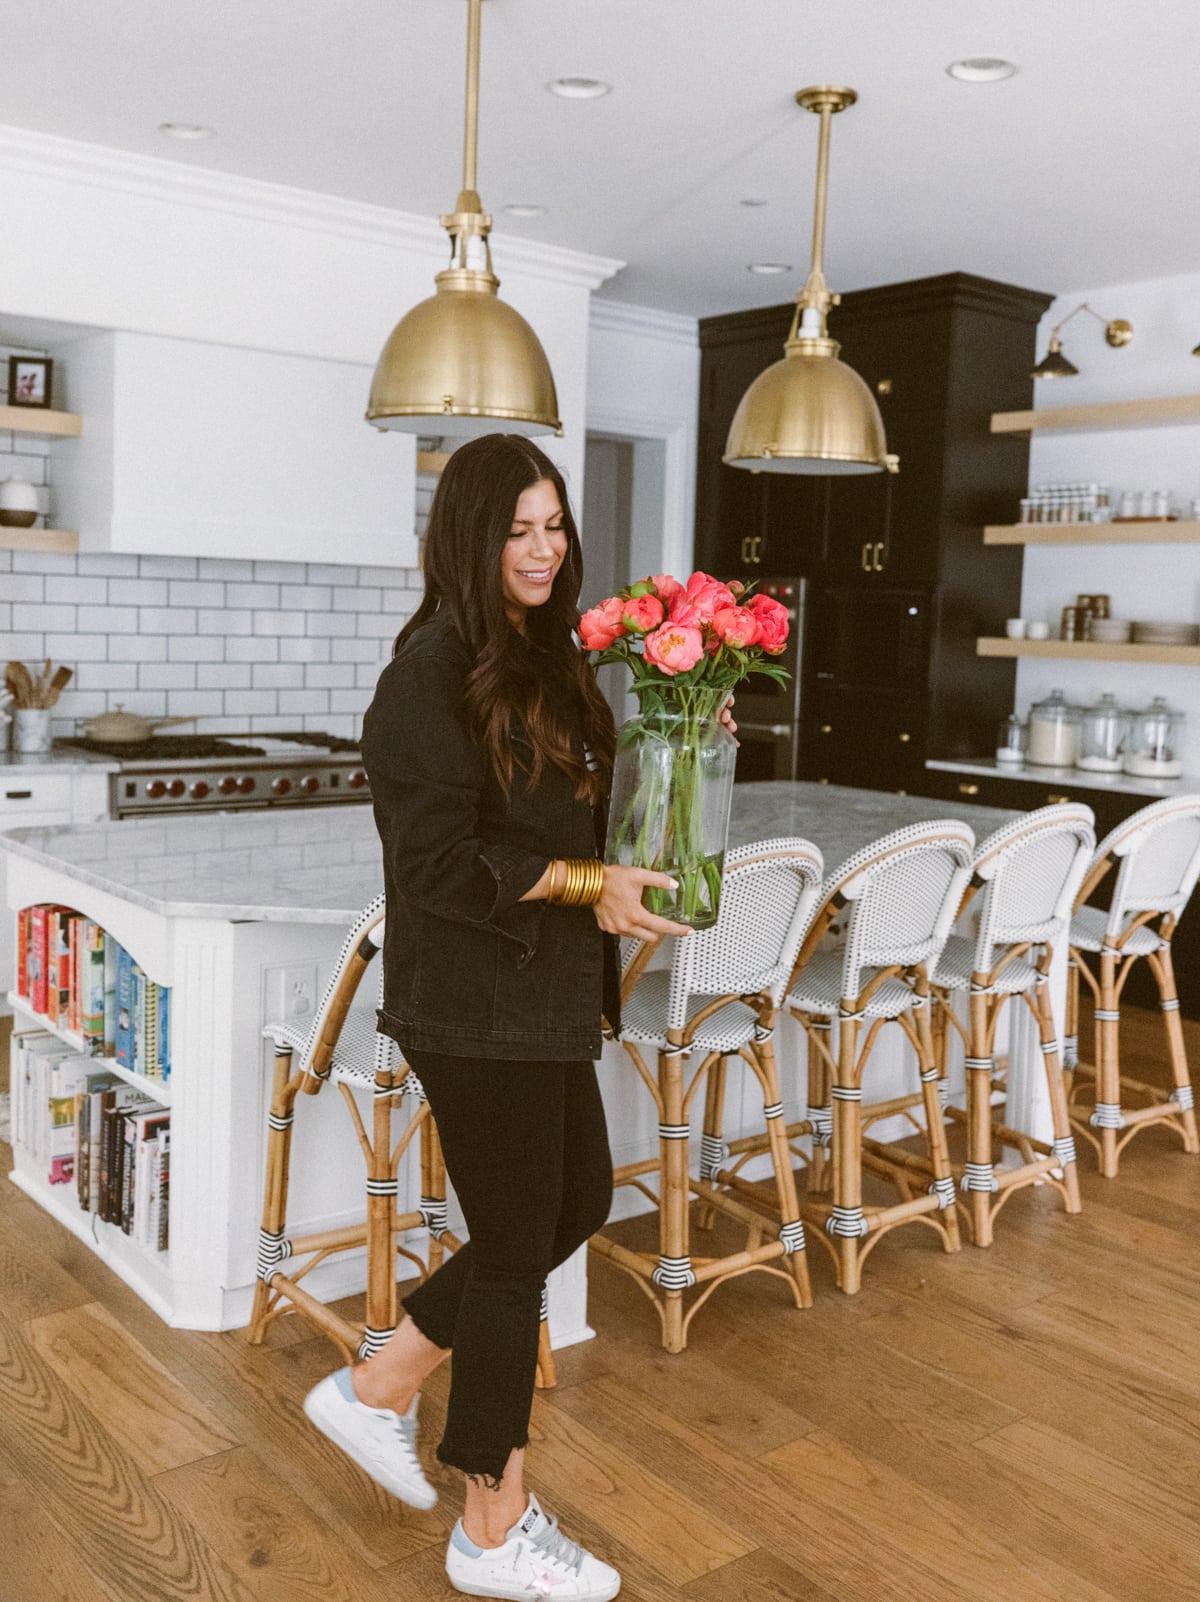
Kitchen shiplap
The ideal backsplash situation (with an unlimited budget) would have been be a marble slab that goes from the countertops all the way up the wall, but then the new marble wouldn’t match the existing countertops that we already had. This is where we had to draw the line at the snowball effect! So instead we went with the shiplap, and I am SO glad we did!
I was having such a hard time picking tile when our designer suggested shiplap! I was a little bit hesitant at first but after looking at a bunch of pictures of inspiration, I was sold. We are always going for a coastal, beachy vibe and I think this is the perfect touch to our kitchen!
I am so glad we did the shiplap! It looks so good and was a fraction of the price of any tile option that I liked. It went up SO fast because it’s so easy to install and paint! If you’re a DIY’er this is a great place to save even more $$$ by installing it yourself!
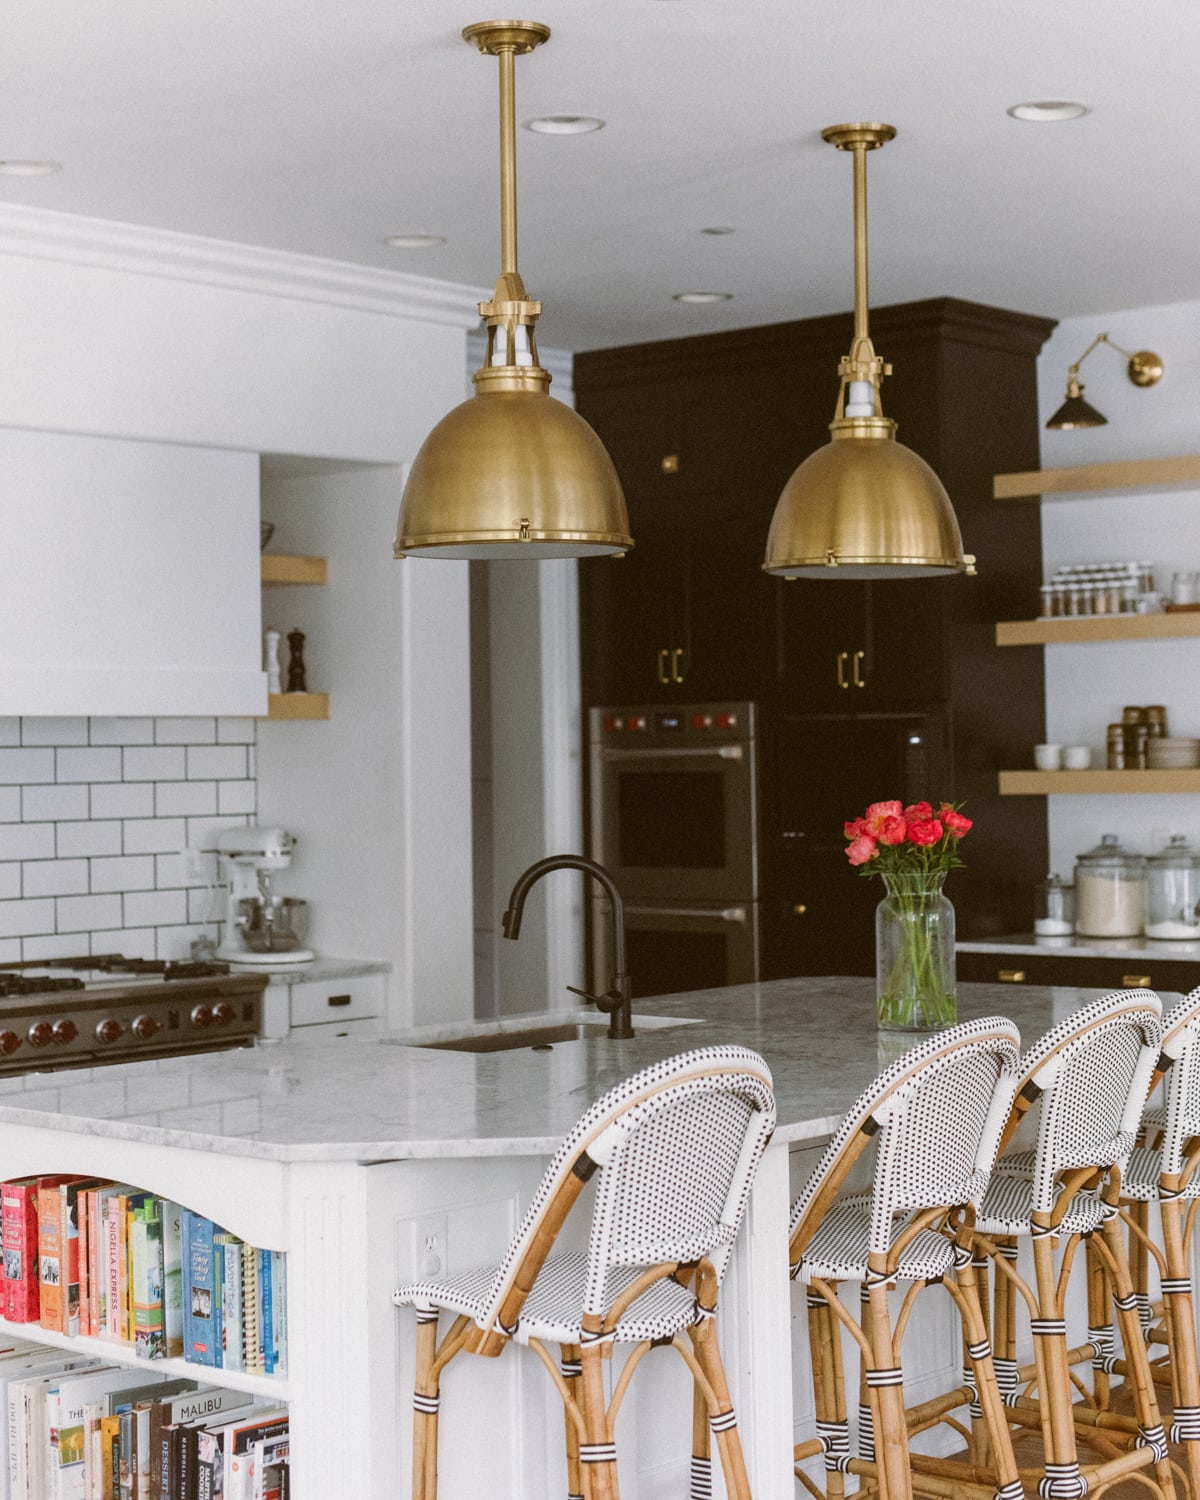
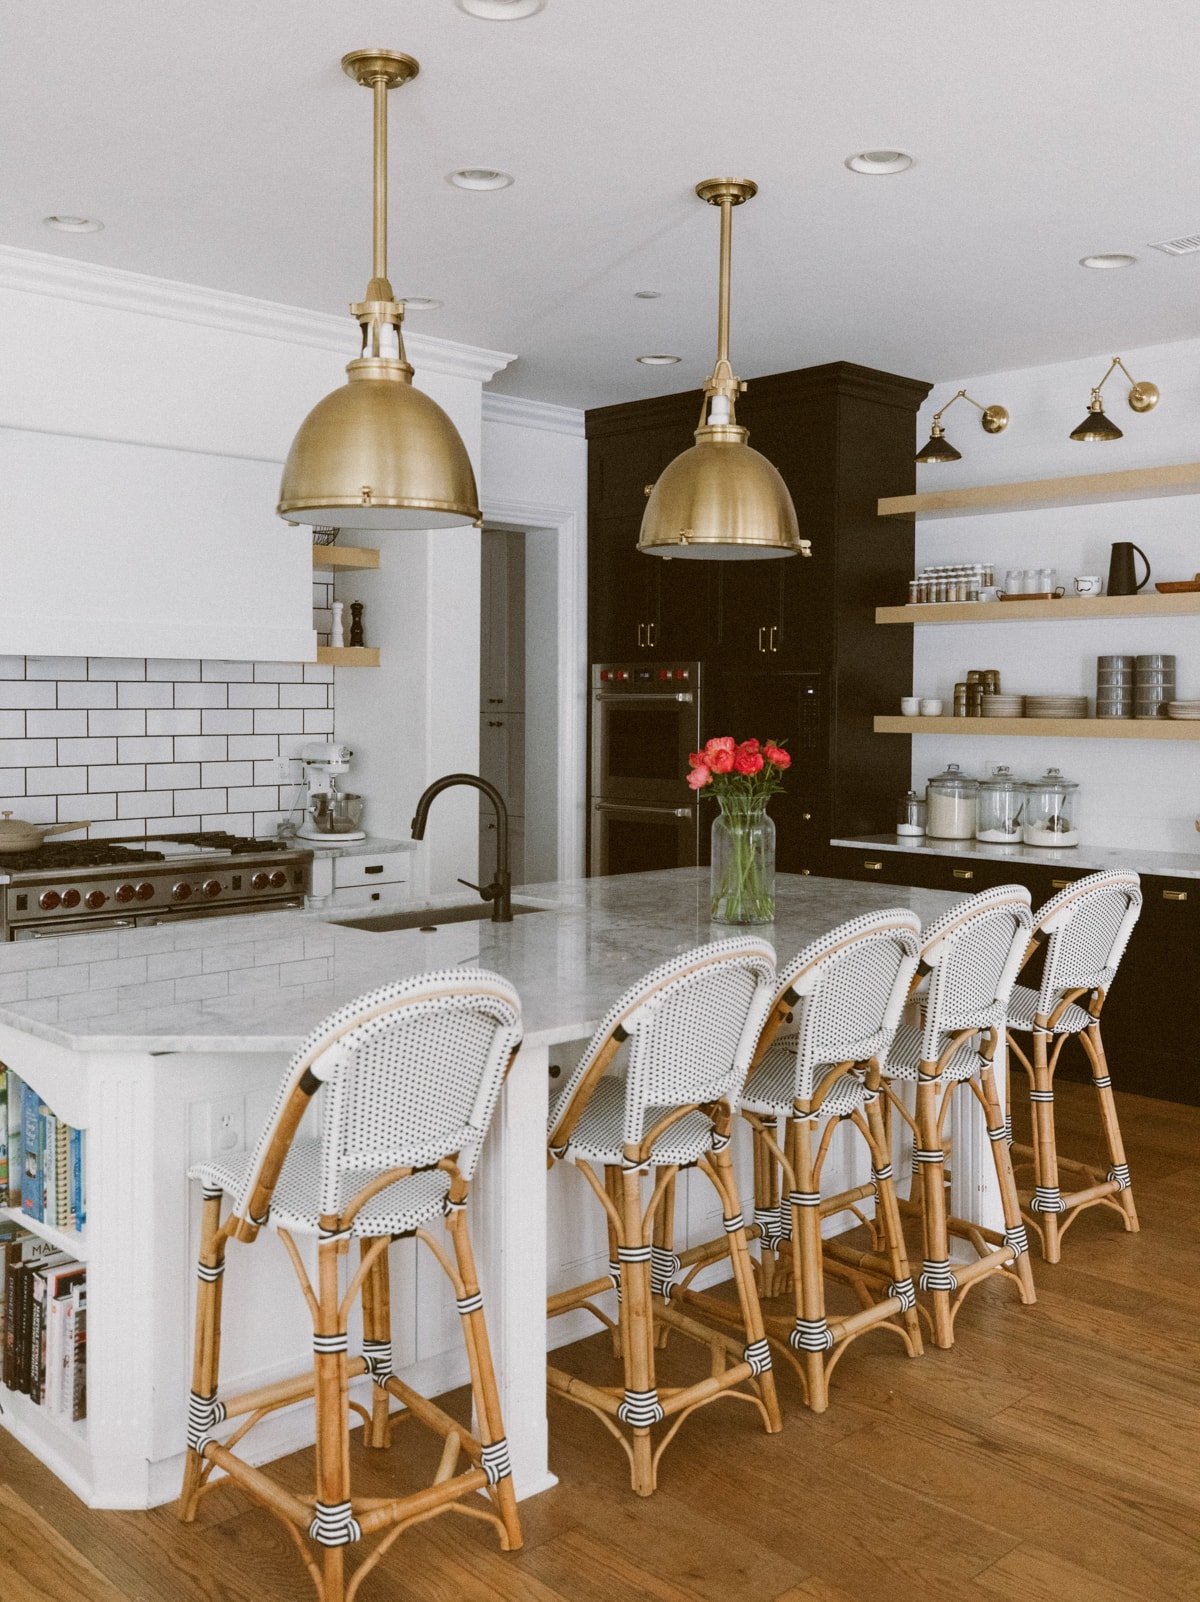
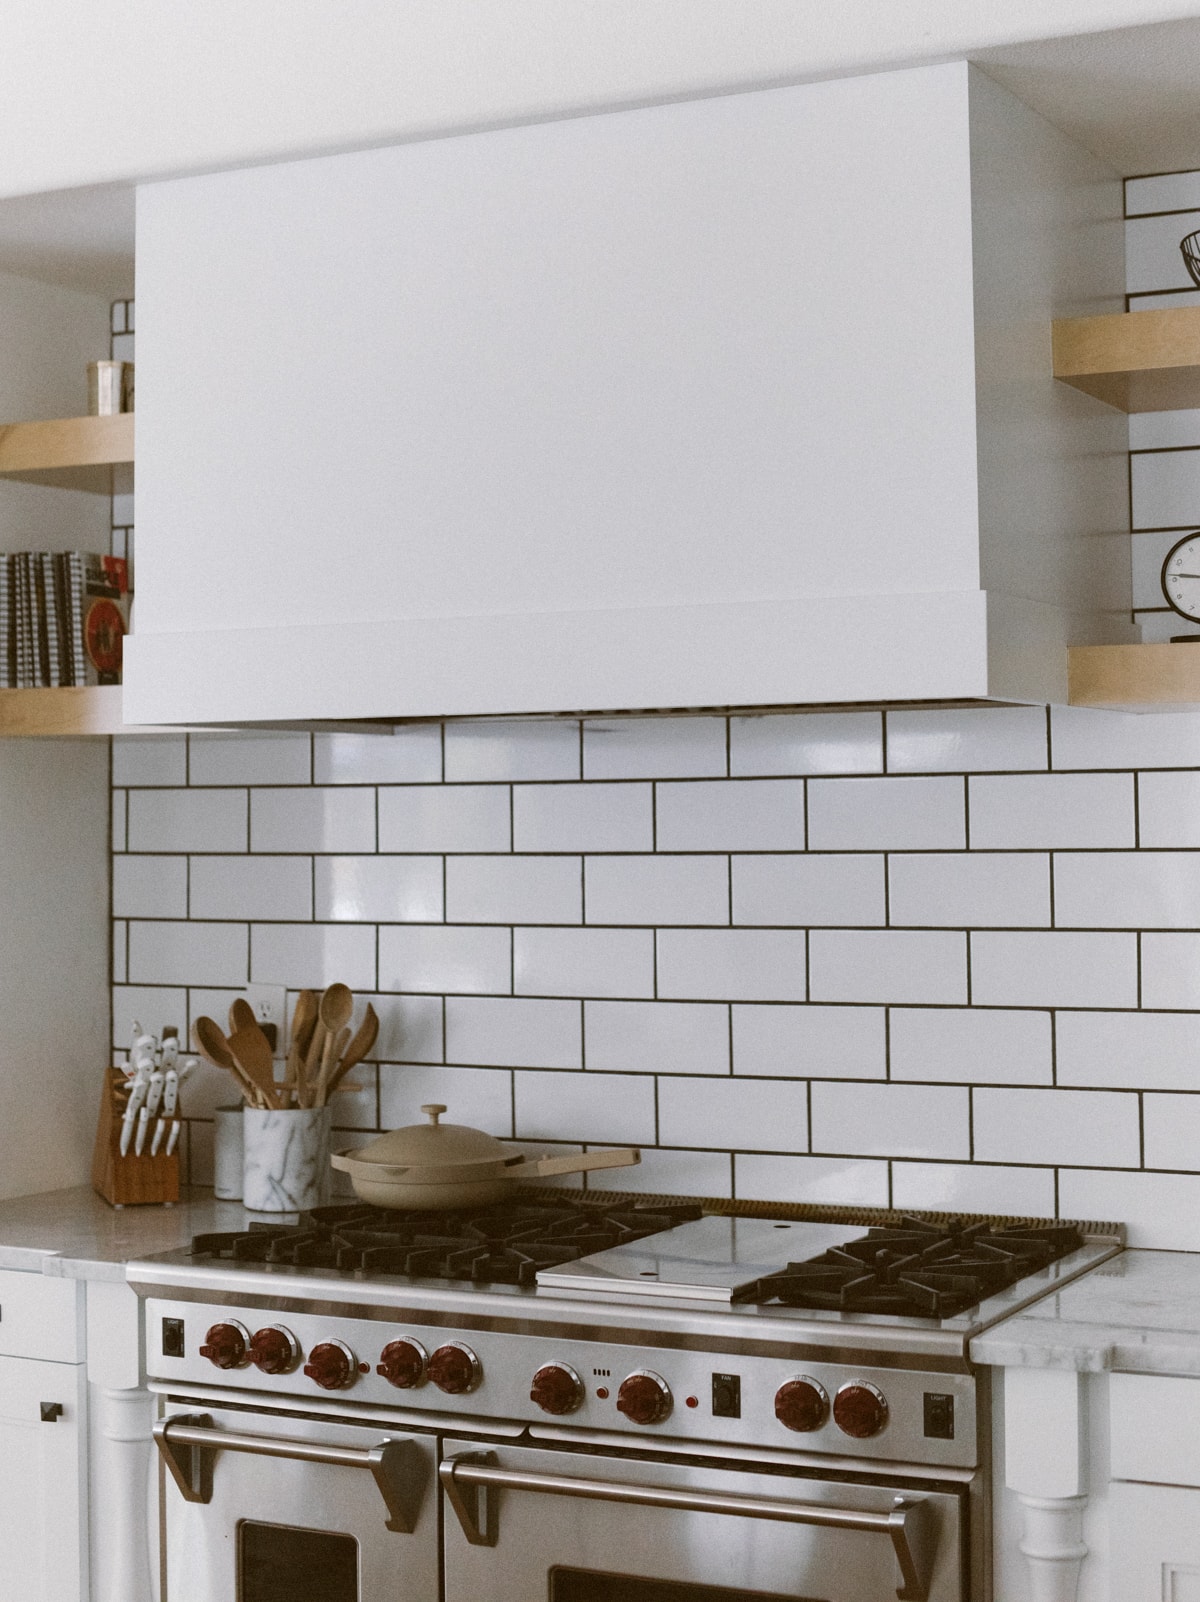
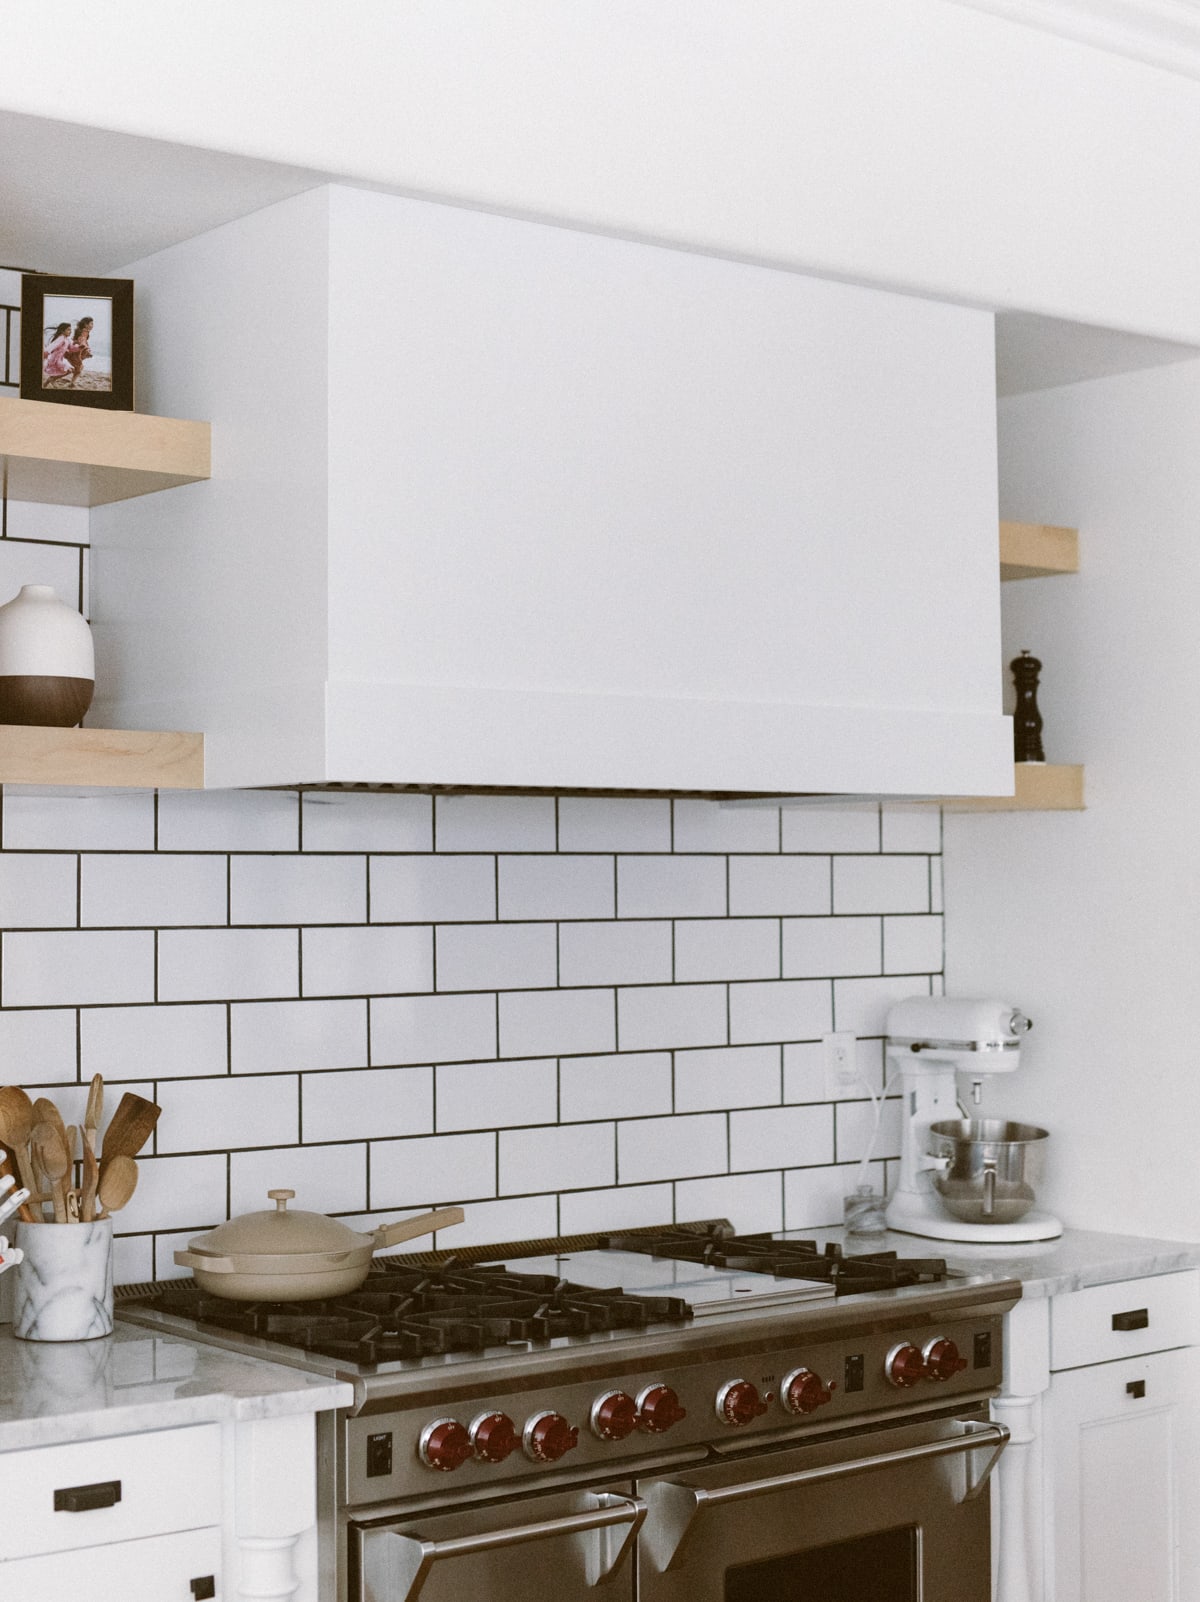
Kitchen hood
The last thing I really wanted to change about the kitchen was our hood. I never loved the big stainless steel hood so instead of buying a whole new range, the contractor wrapped the whole thing in wood! This was such a easy way to solve something I didn’t love about our kitchen without spending an arm and a leg. It also gave us the opportunity to add these two small little floating shelves on either side for even more storage and visual interest.
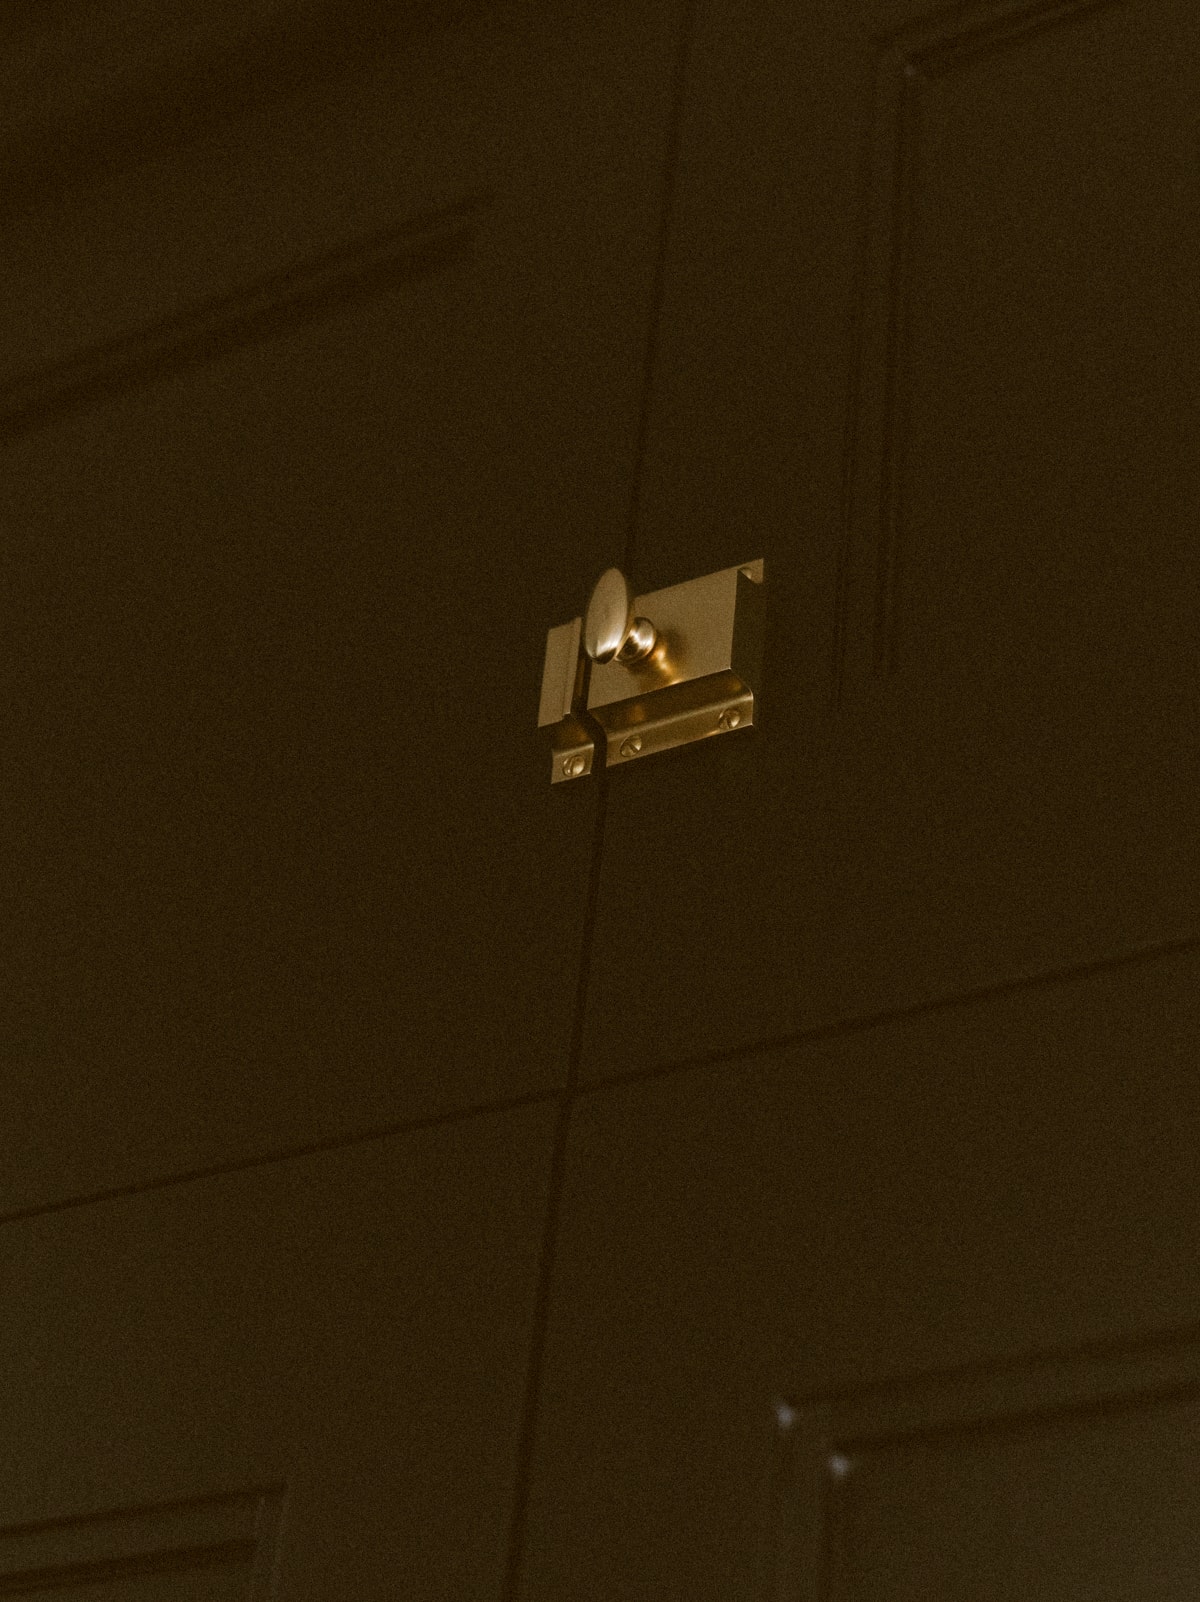
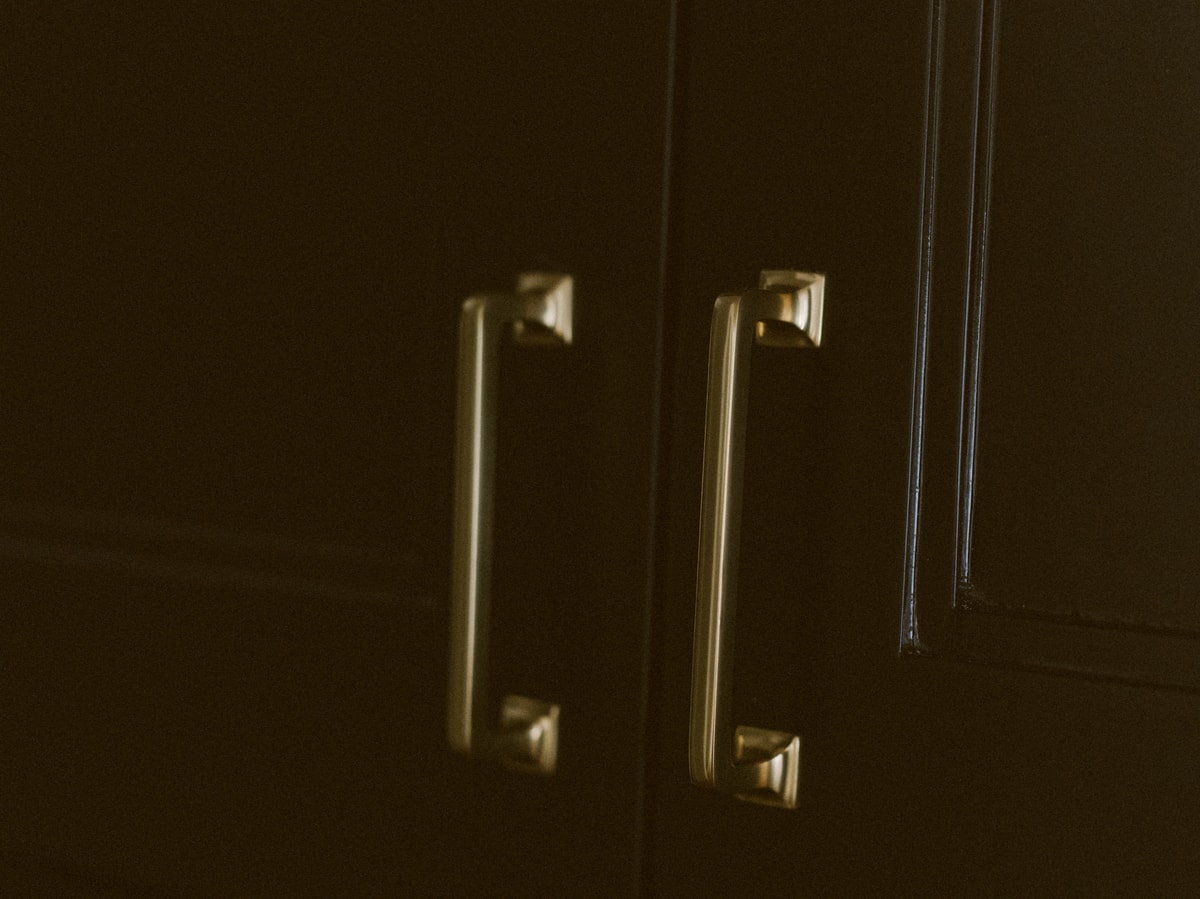
Cabinet hardware
I knew that new hardware would make a difference but I was shocked at the transformation! The gold with the black just gives me all the heart eyes. It makes the wall of black cabinets almost look like a piece of furniture!
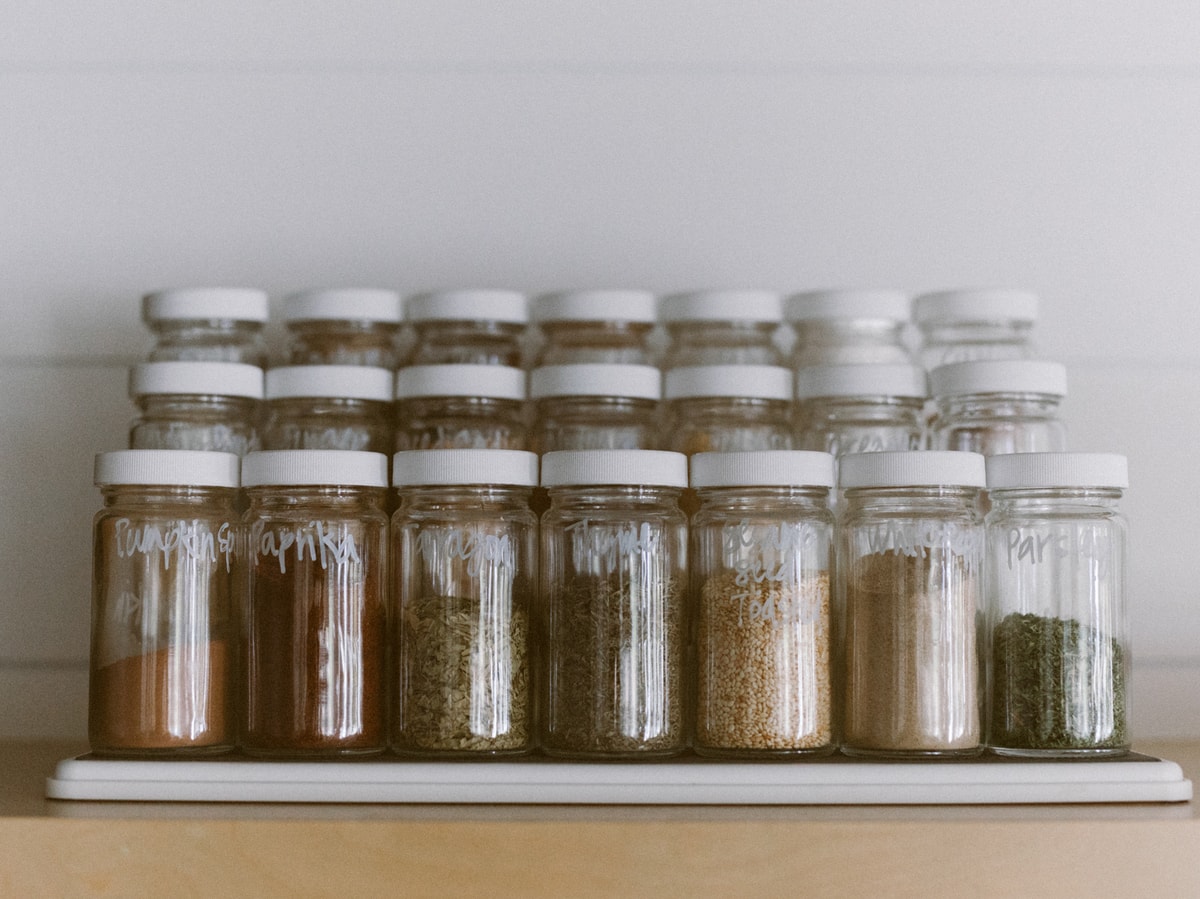
Styling the shelves
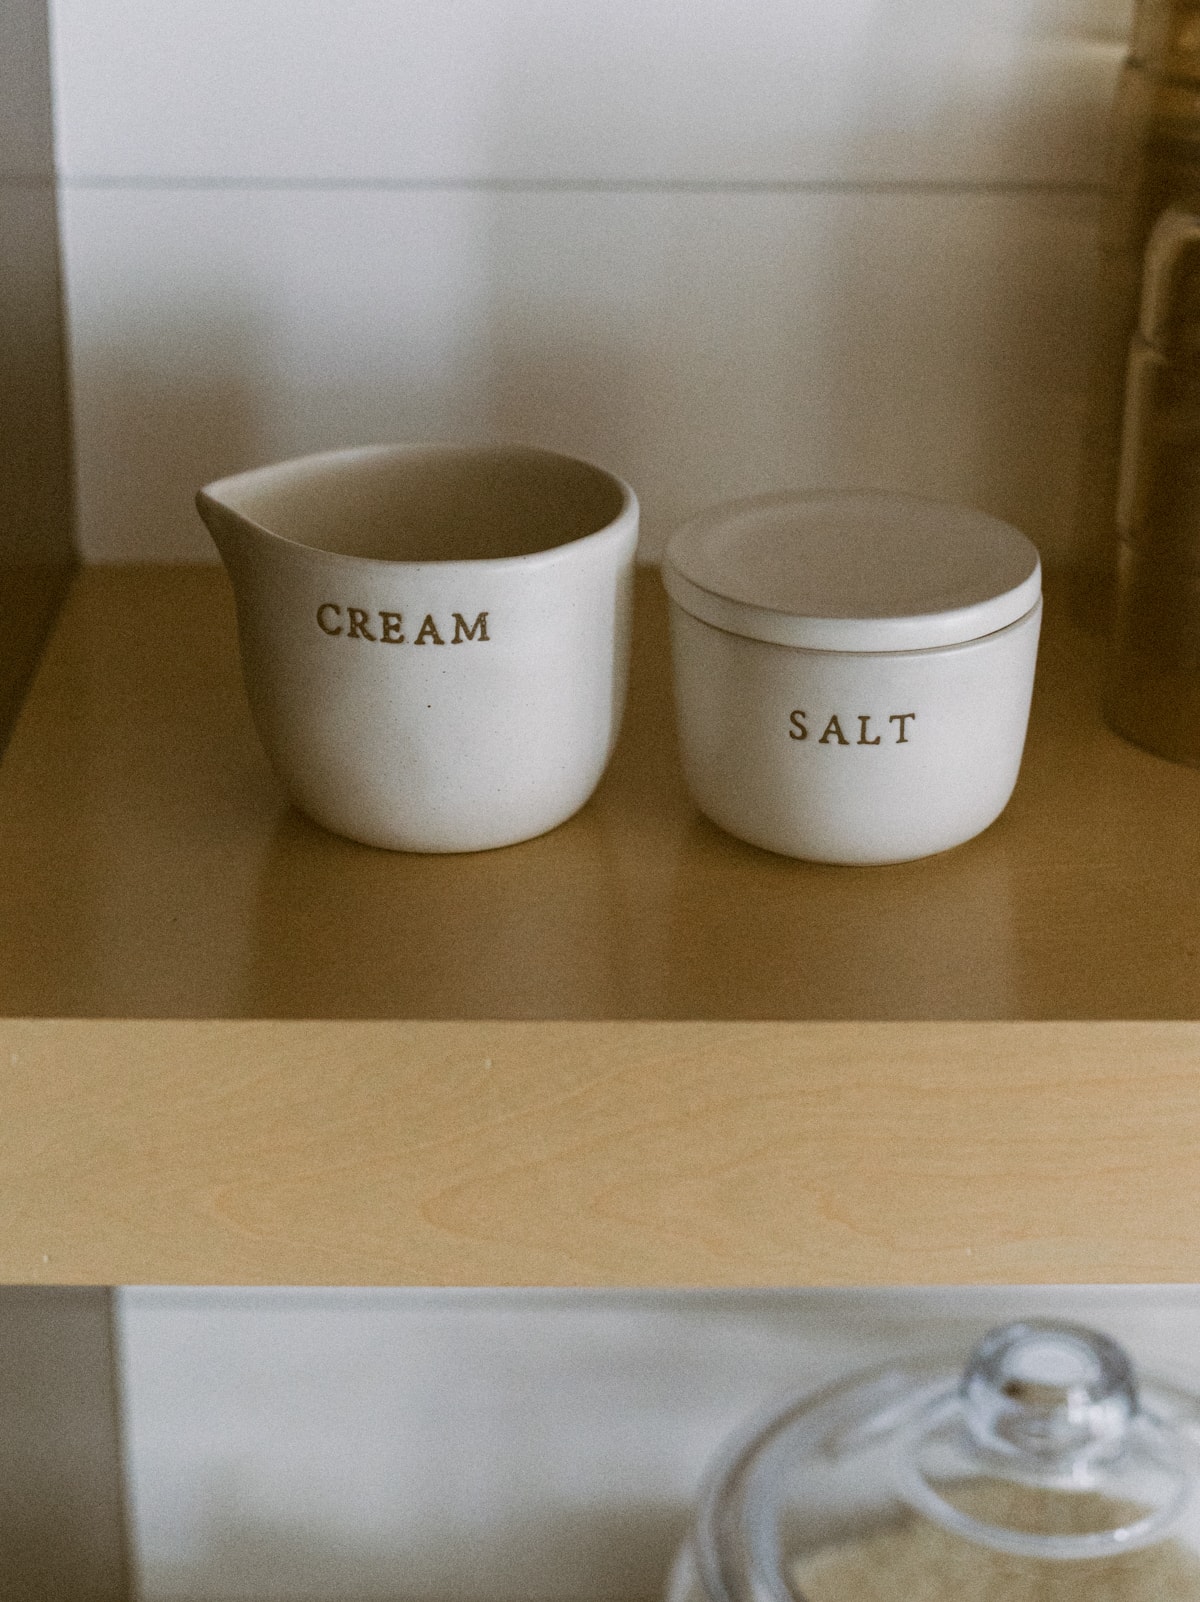
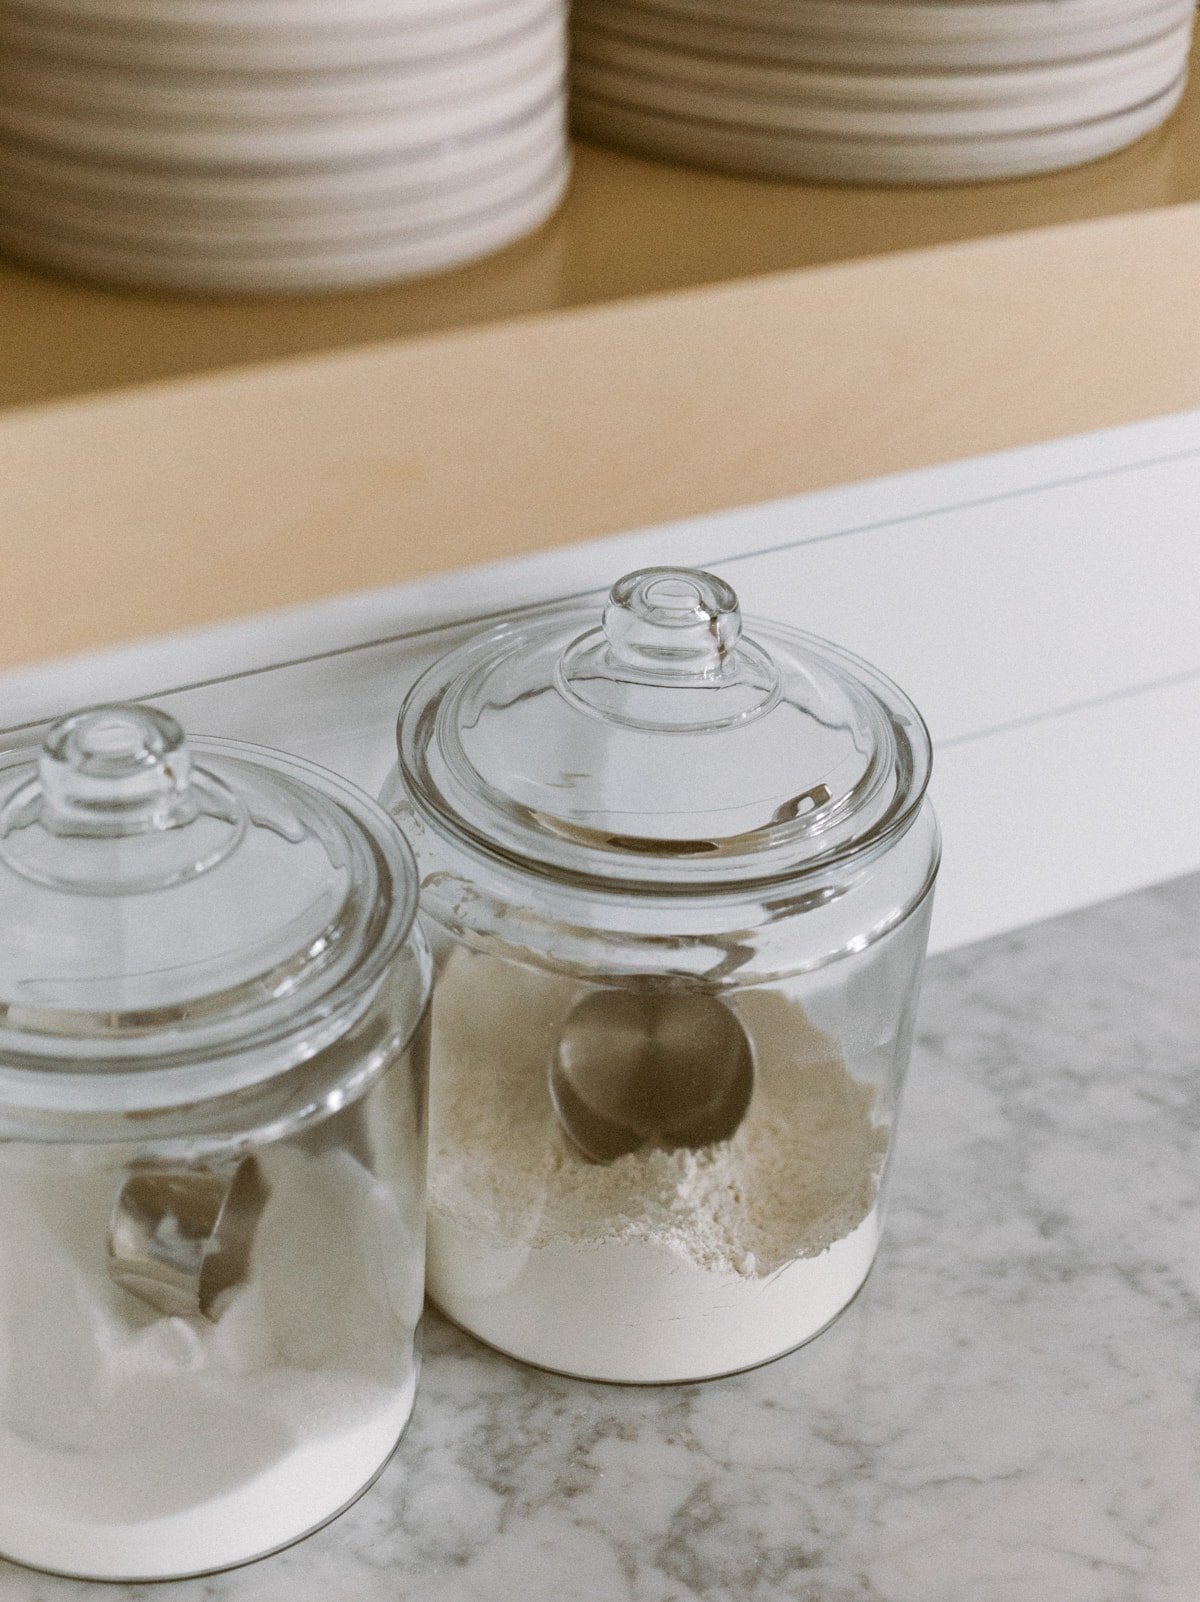
I actually love open shelving because I think you can keep your dishes super basic and it looks like minimalist perfection! These Melamine plates are our favorite because they don’t chip! They’re also surprisingly kid proof and dishwasher safe. Our other pretty dishes are from Our Place and I love how they look on the shelves as well. I also like to get pretty cups that look like glass but are plastic! Best of both worlds.
The rest of the decor is from Roolee Home and I was so excited about how it all turned out. Super neutral but functional! And, can you believe I never had a cake stand with a lid before this?! Obsessed. Truly, all of this decor was the icing on the cake of our kitchen remodel!
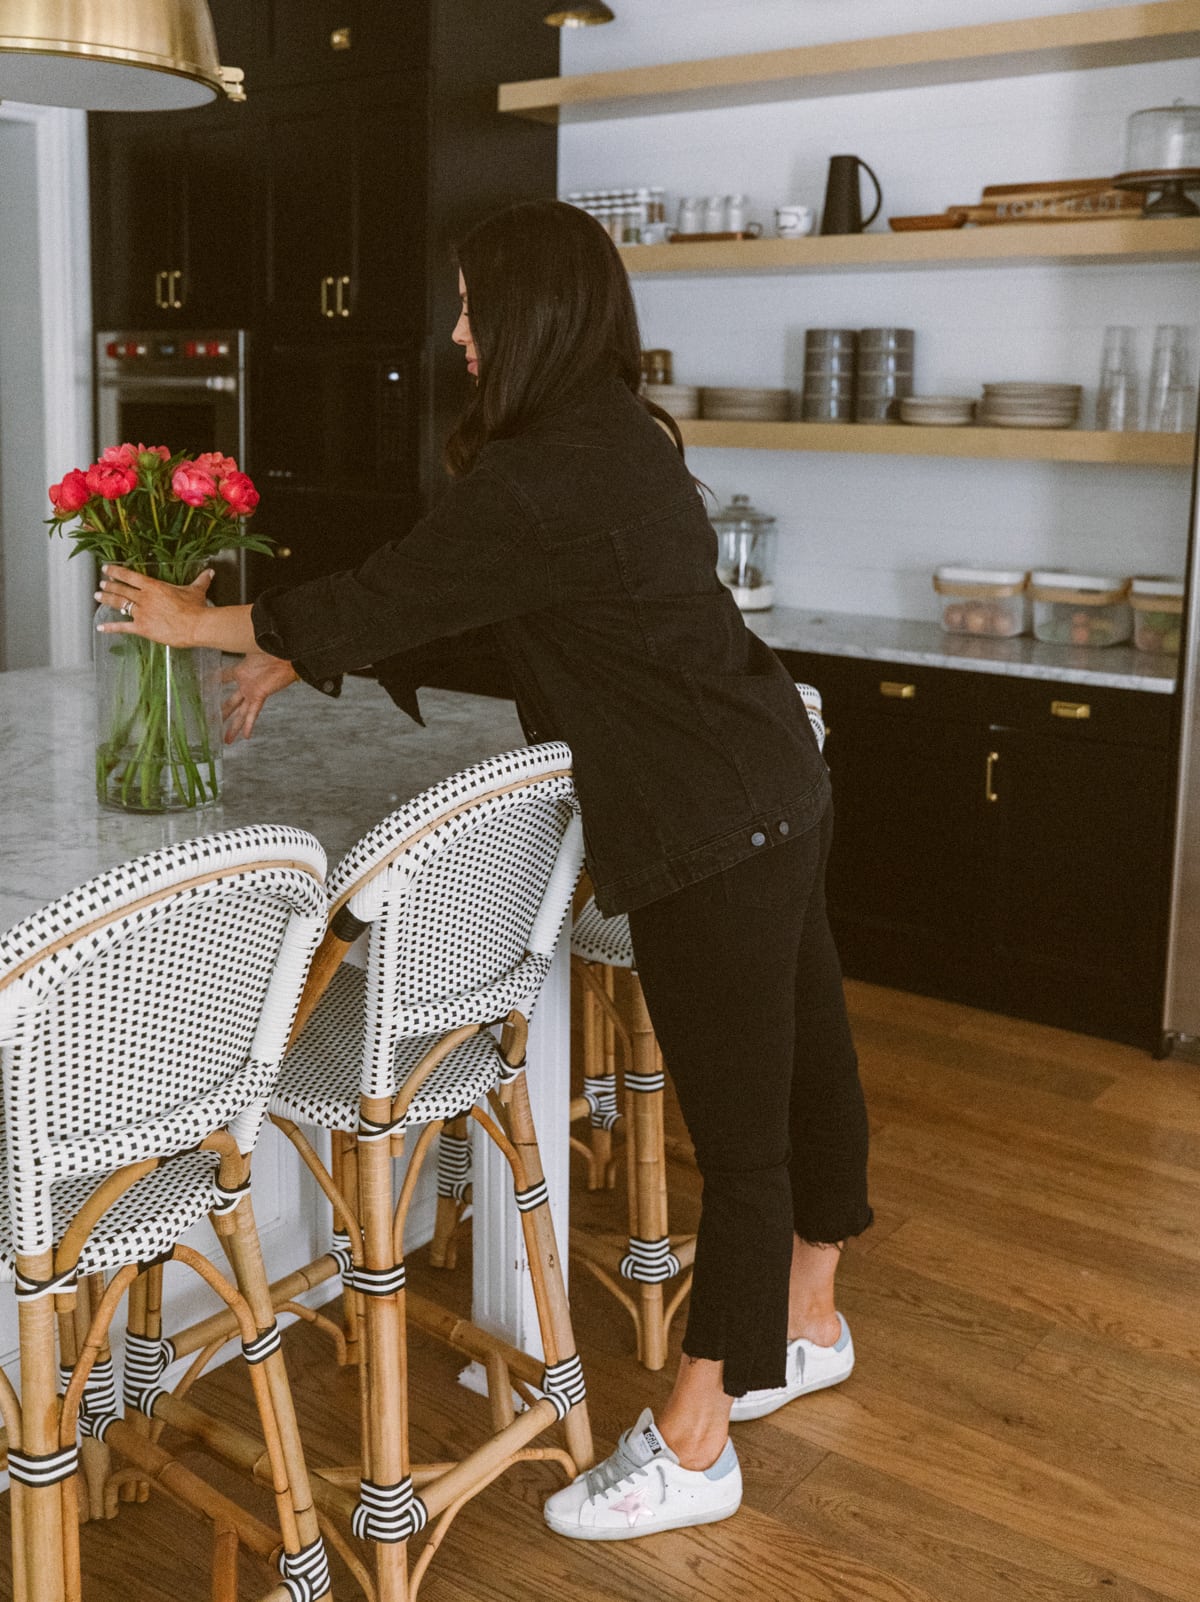
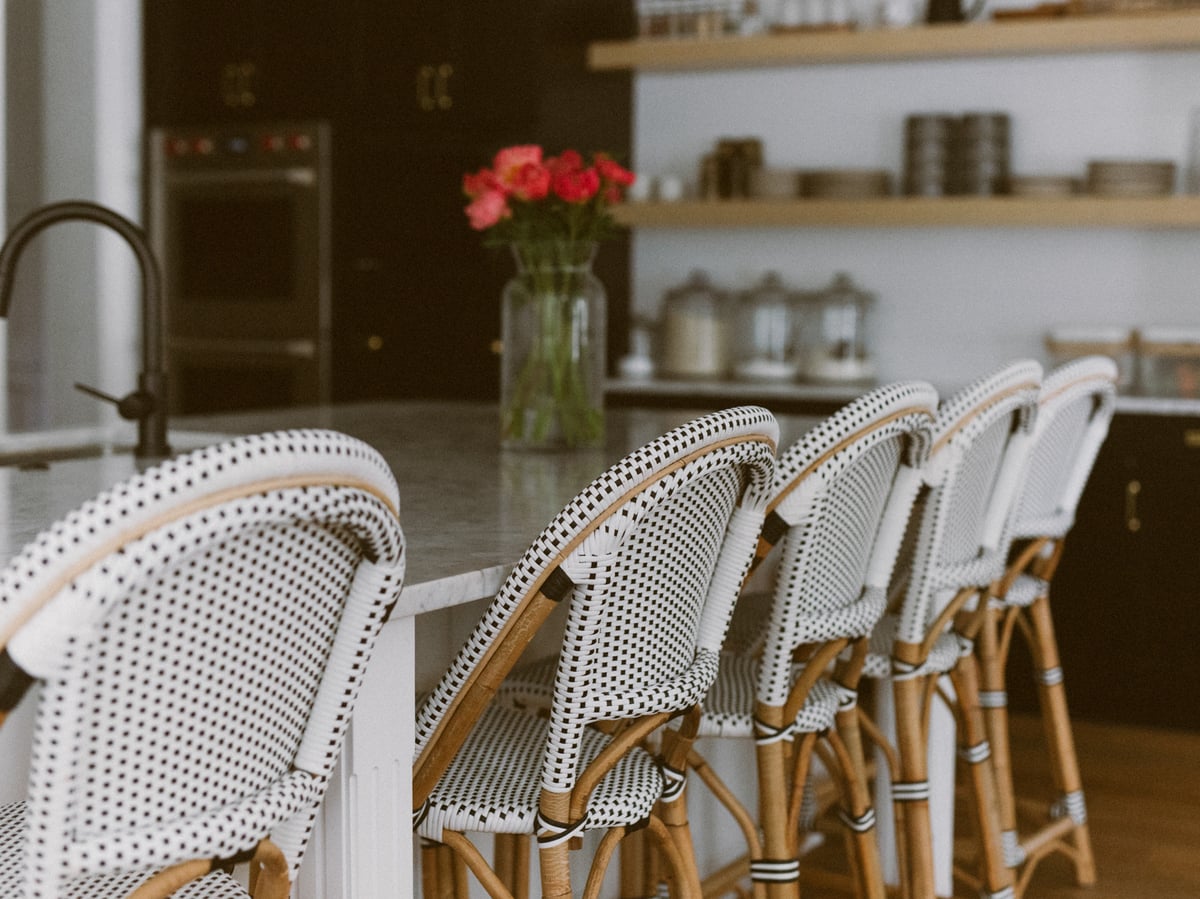
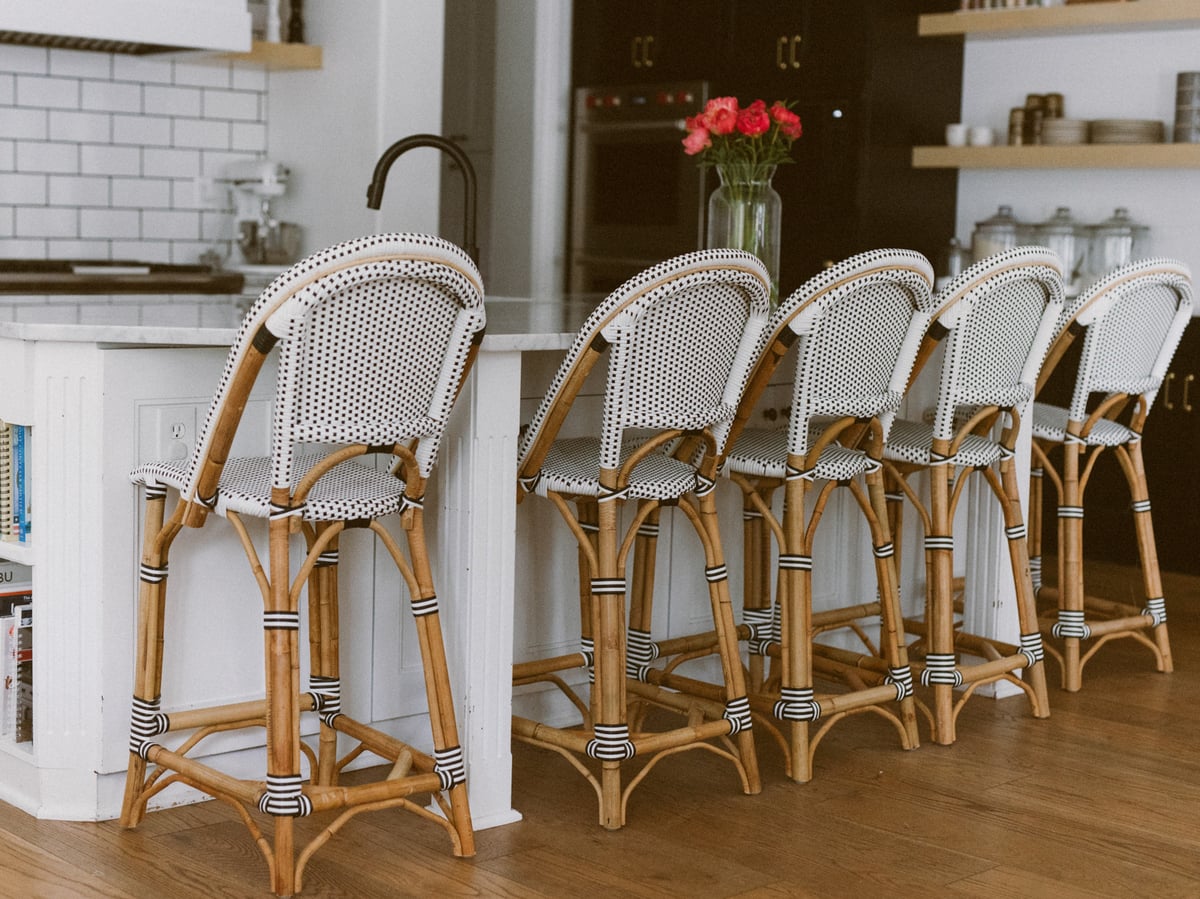
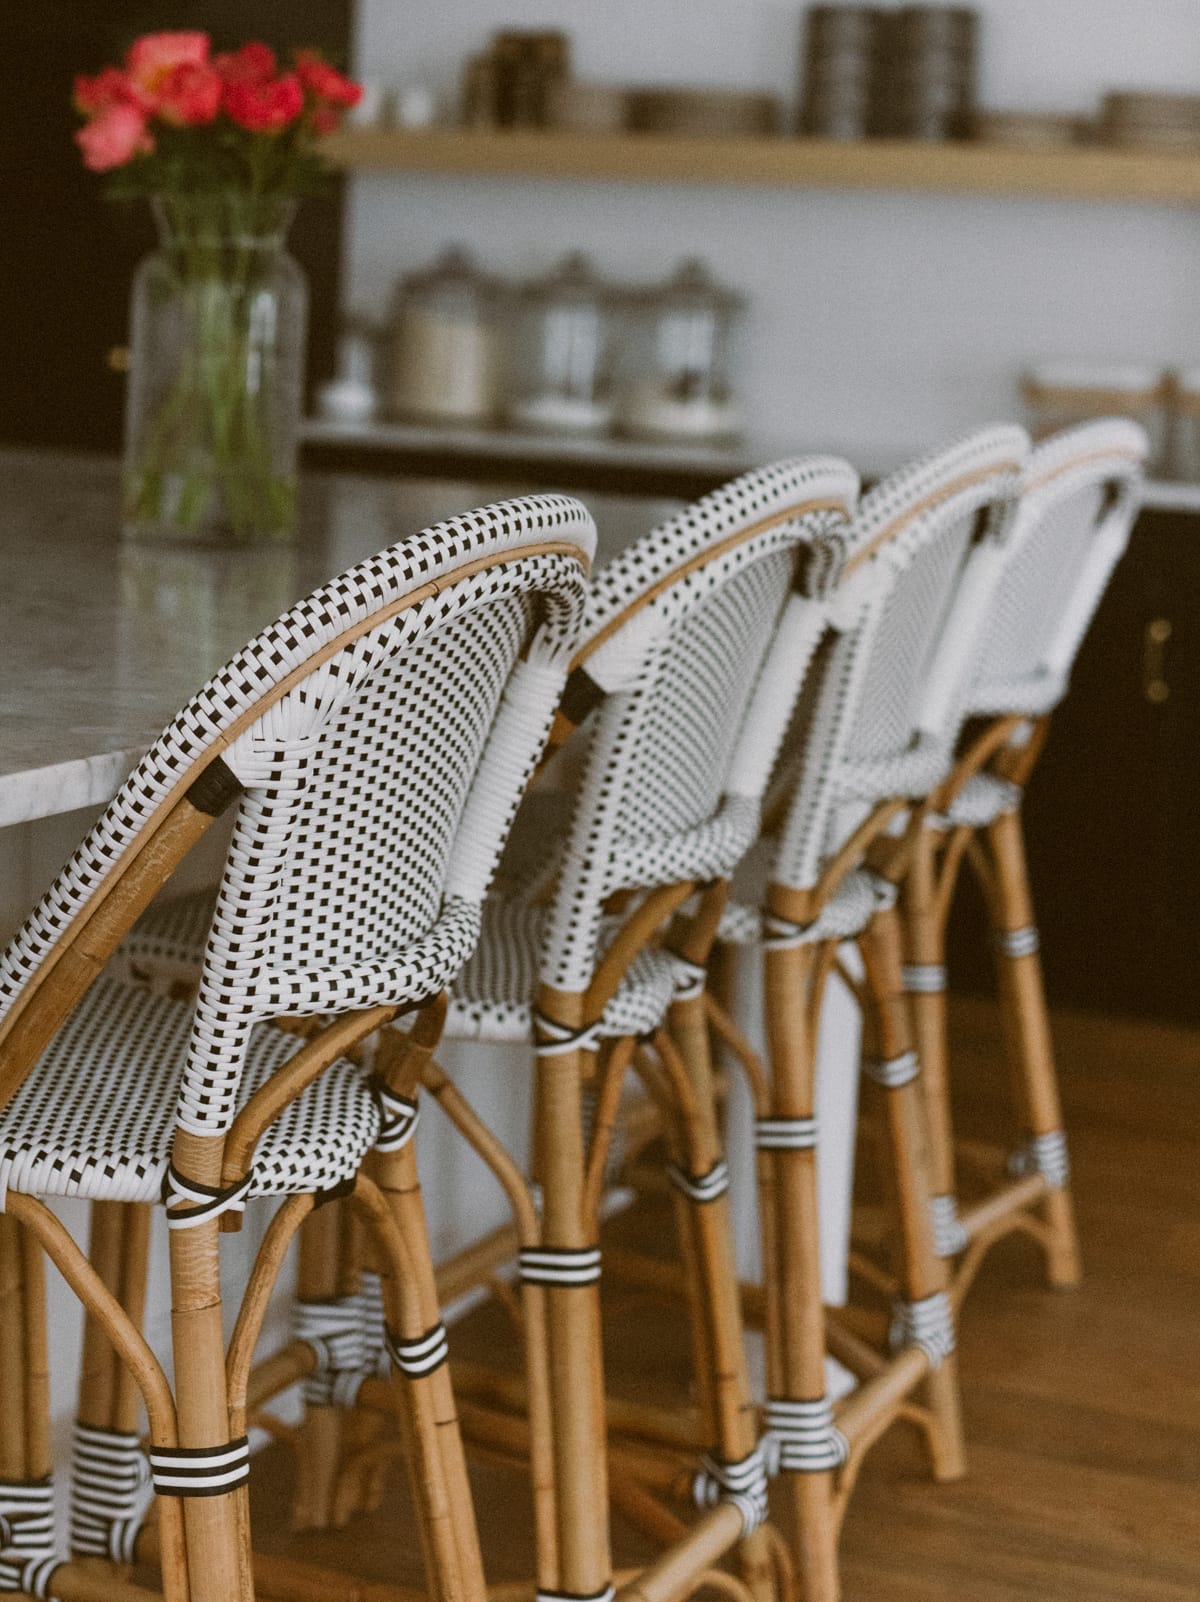
Best bar stools ever
We also had to replace our bar stools from when we originally moved into this kitchen, mostly because Millie rocked back and hit her head really hard when she fell off one of our old stools! That freaked me out enough to want something super solid, sturdy and that would last forever. I’d heard over and OVER that these bar stools were the best and I am 100% sold on them. They don’t rock back easily AT ALL (my kids hate this – I LOVE IT), and they’re surprisingly VERY easy to clean. In fact, my friend who has 5 boys said she takes hers out every once in a while and sprays them down outside and they come back in looking brand new. Amazing mom hack right?!

Saving, not skimping!
Even though this all started with just a couple of ovens (so technically that budget got blown!), this was all stuff we wanted to eventually do to the kitchen. The new ovens just gave us a push in the right direction! And for a mini kitchen remodel, we literally saved THOUSANDS of dollars by figuring out the best place to put our money and being creative with the rest. I think it still looks like a million bucks!


Can you share the paint color used on the cabinets, please?
Looks amazing!! Also, can you share the source for the gold pendants hanging over your island?
Hey Alyssa! Here is a link to Corrine’s pendants! 🙂 -Kourtney